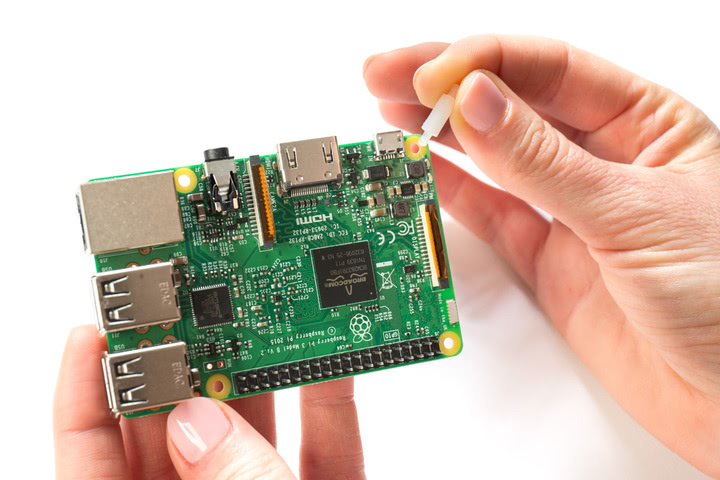
Find your Raspberry Pi 3 and the two plastic standoffs that came with your kit.
Insert the standoffs into the two yellow holes opposite the 40-pin box header on your Raspberry Pi 3. They should snap into place.
This project demonstrates how to get a natural language recognizer up and running and connect it to the Google Assistant, using your AIY Projects voice kit. Along with everything the Google Assistant already does, you can add your own question and answer pairs. All in a handy little cardboard cube, powered by a Raspberry Pi.
Don’t own a kit? You can also integrate the Google Assistant into your own hardware by following the official Google Assistant SDK guides.
Assembling the kit and setting up the Google Assistant SDK should take about an hour and a half.
Open the box and verify you have all of the necessary components in your kit. You’ll also need a couple of tools for assembly.
This guide shows you how to assemble the AIY Projects voice kit.
The kit is composed of simple cardboard form, a Raspberry Pi board, Voice HAT (an accessory board for voice recognition) and a few common components.
By the end of this guide, your voice project will be assembled with the Raspberry Pi board and other components connected and running. Then you’ll move on the User’s Guide to bring it to life!
The Voice Kit requires a special version of the Raspbian operating system that includes some extra AIY software. So before you begin, you need to download the Voice Kit system image and flash it to your MicroSD card.
.img.xz file from the releases page on GitHub..img.xz file onto your MicroSD card. (Etcher is free and works on Windows, Mac OS, and Linux.)Flashing the system image onto the card can take a several minutes. So while that’s going, start assembling the kit. Once the kit is assembled, you'll put the card into it.
Find your Raspberry Pi 3 and the two plastic standoffs that came with your kit.
Insert the standoffs into the two yellow holes opposite the 40-pin box header on your Raspberry Pi 3. They should snap into place.
Take your Voice HAT accessory board and attach it to the Raspberry Pi 3 box header.
Gently press down to make sure the pins are secure. On the other side, press down to snap the spacers into place.
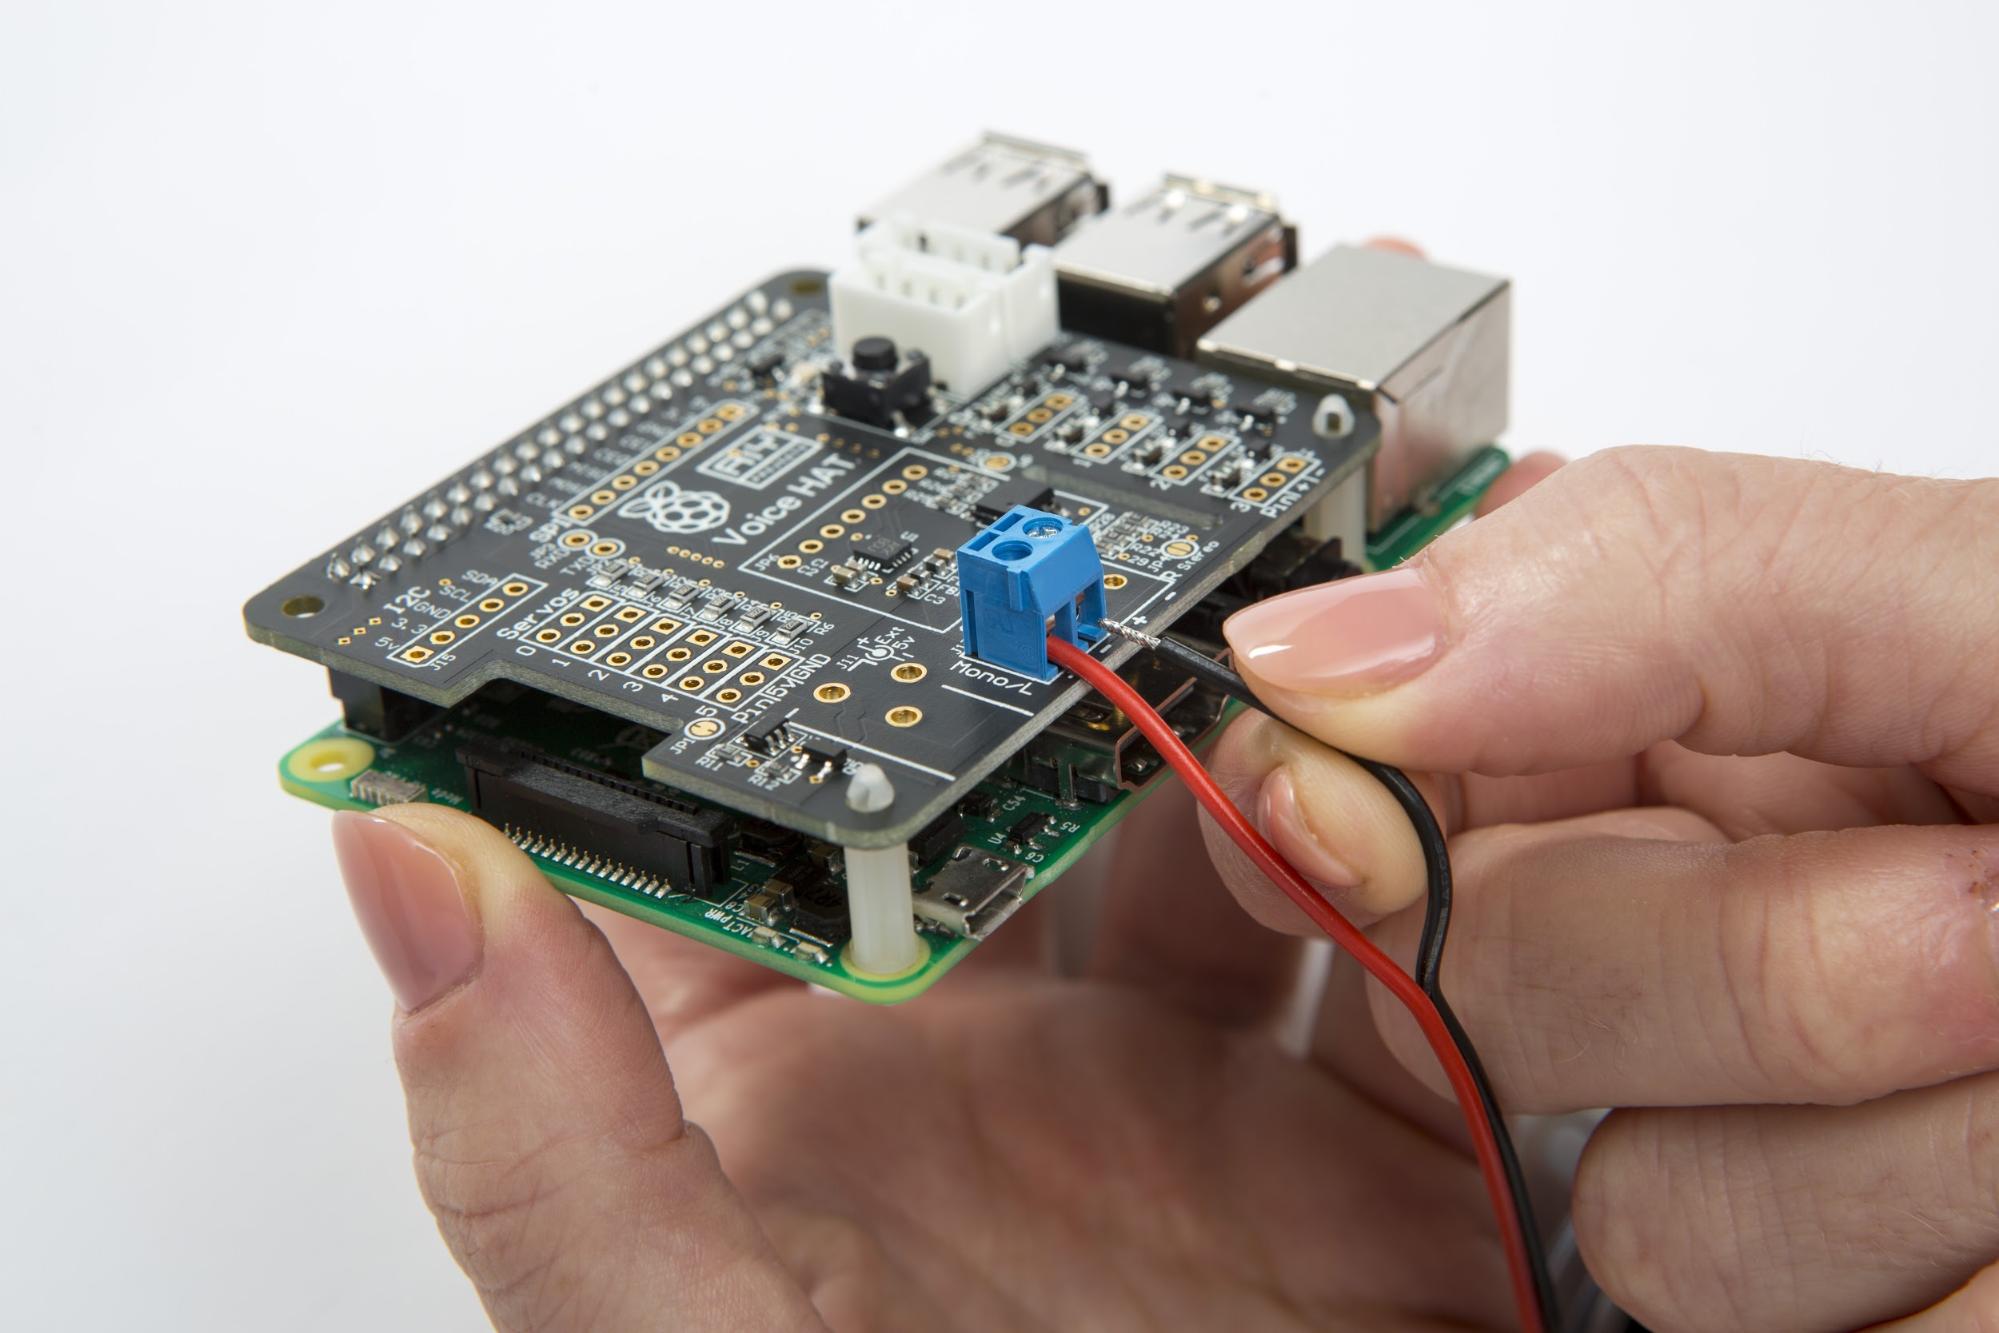
Find the speaker with the red and black wires attached. Insert the speaker’s red wire end into the “+” terminal on the Voice HAT blue screw connector.
Do the same for the black wire end into the “-” terminal. At this point, they should be sitting there unsecured.
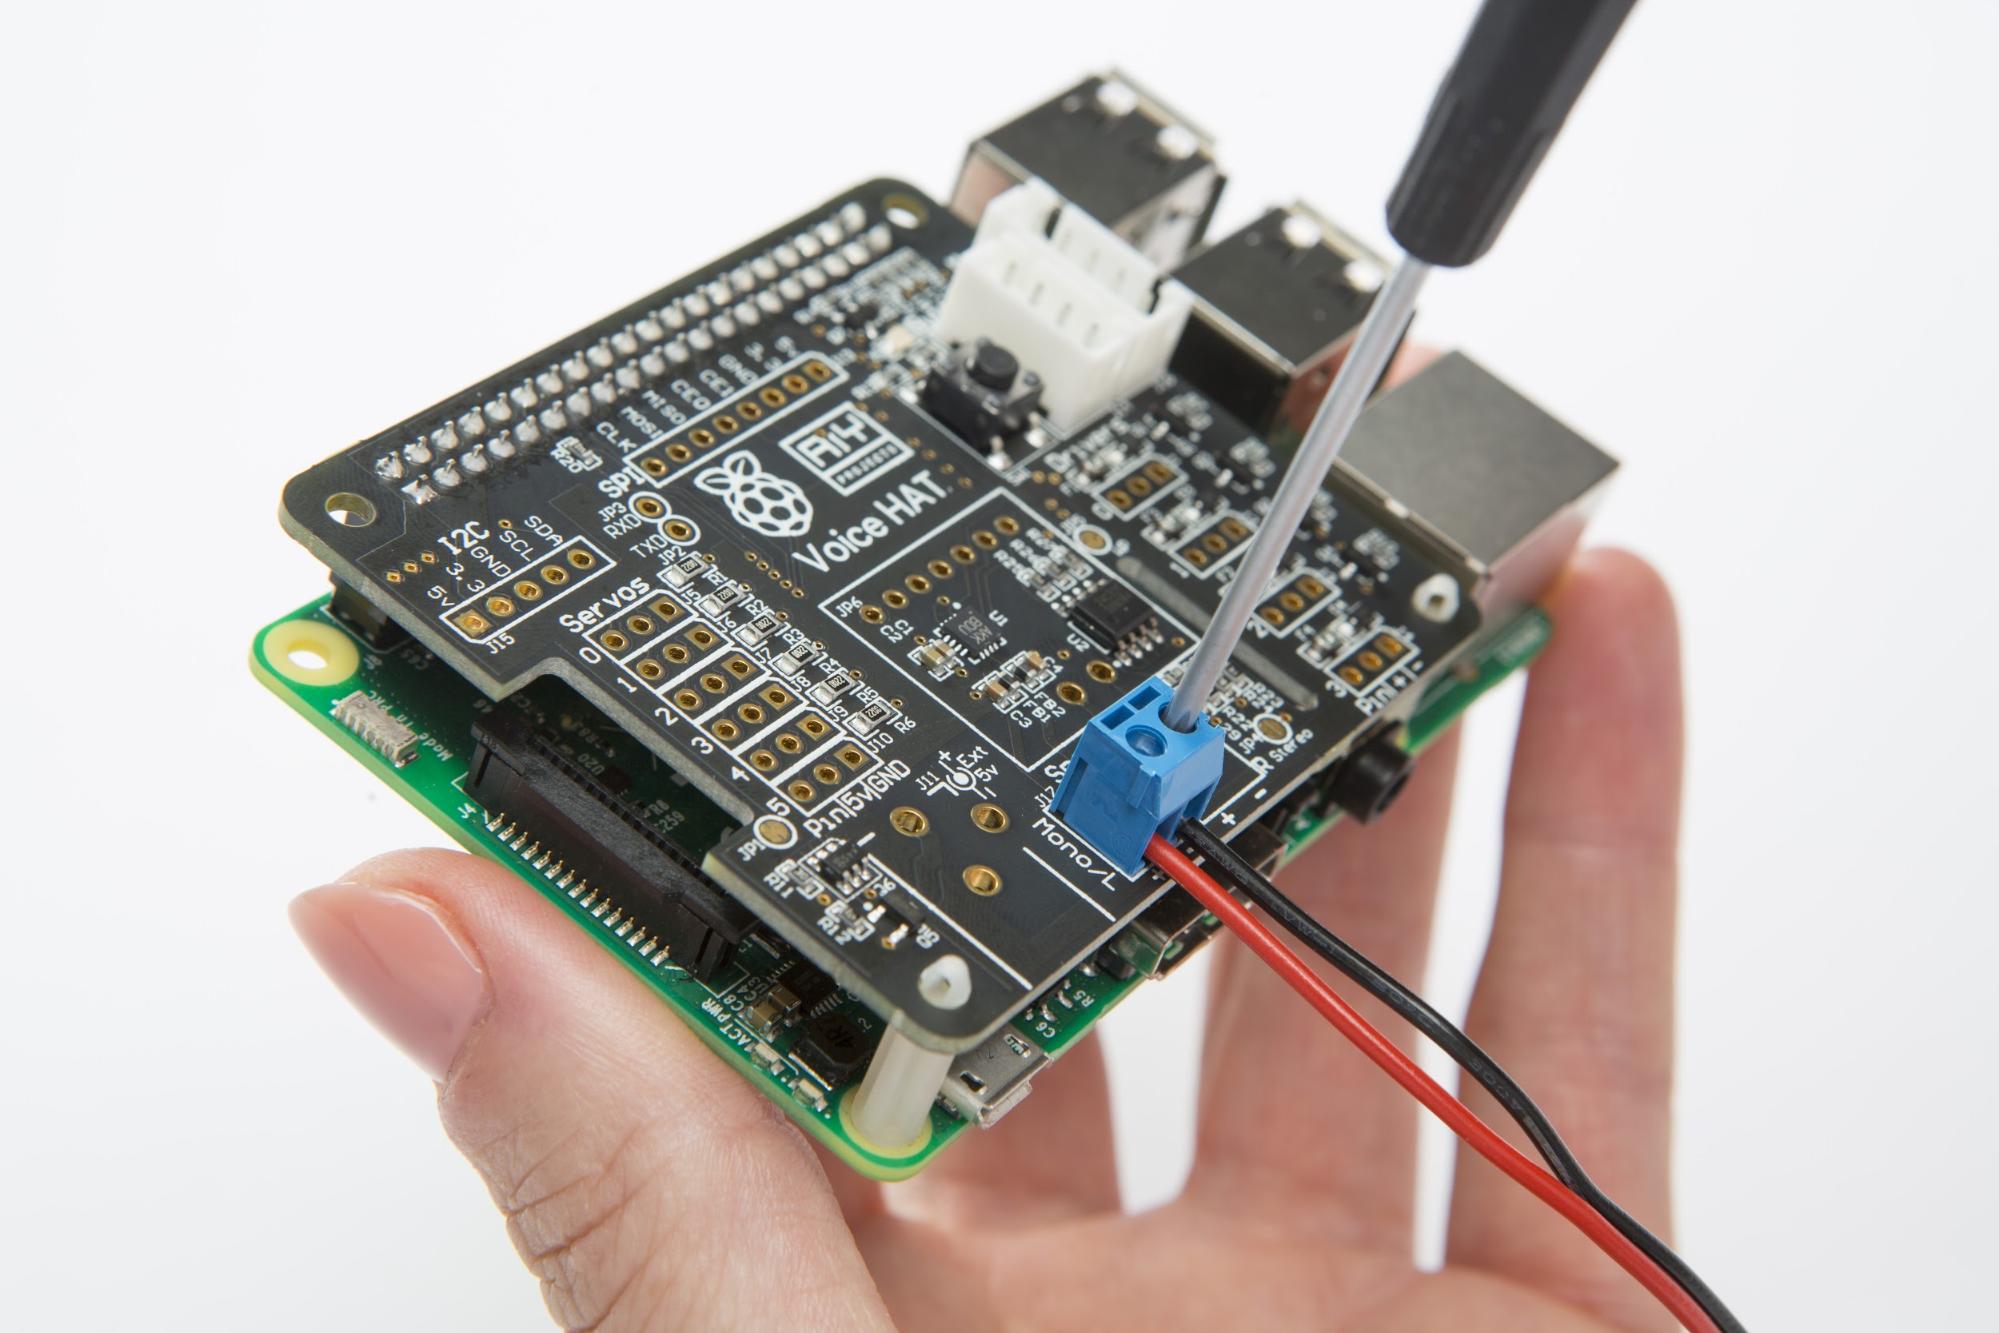
Now screw the wires in place with a Phillips “00” screwdriver.
Gently tug on the wires to make sure they’re secure.
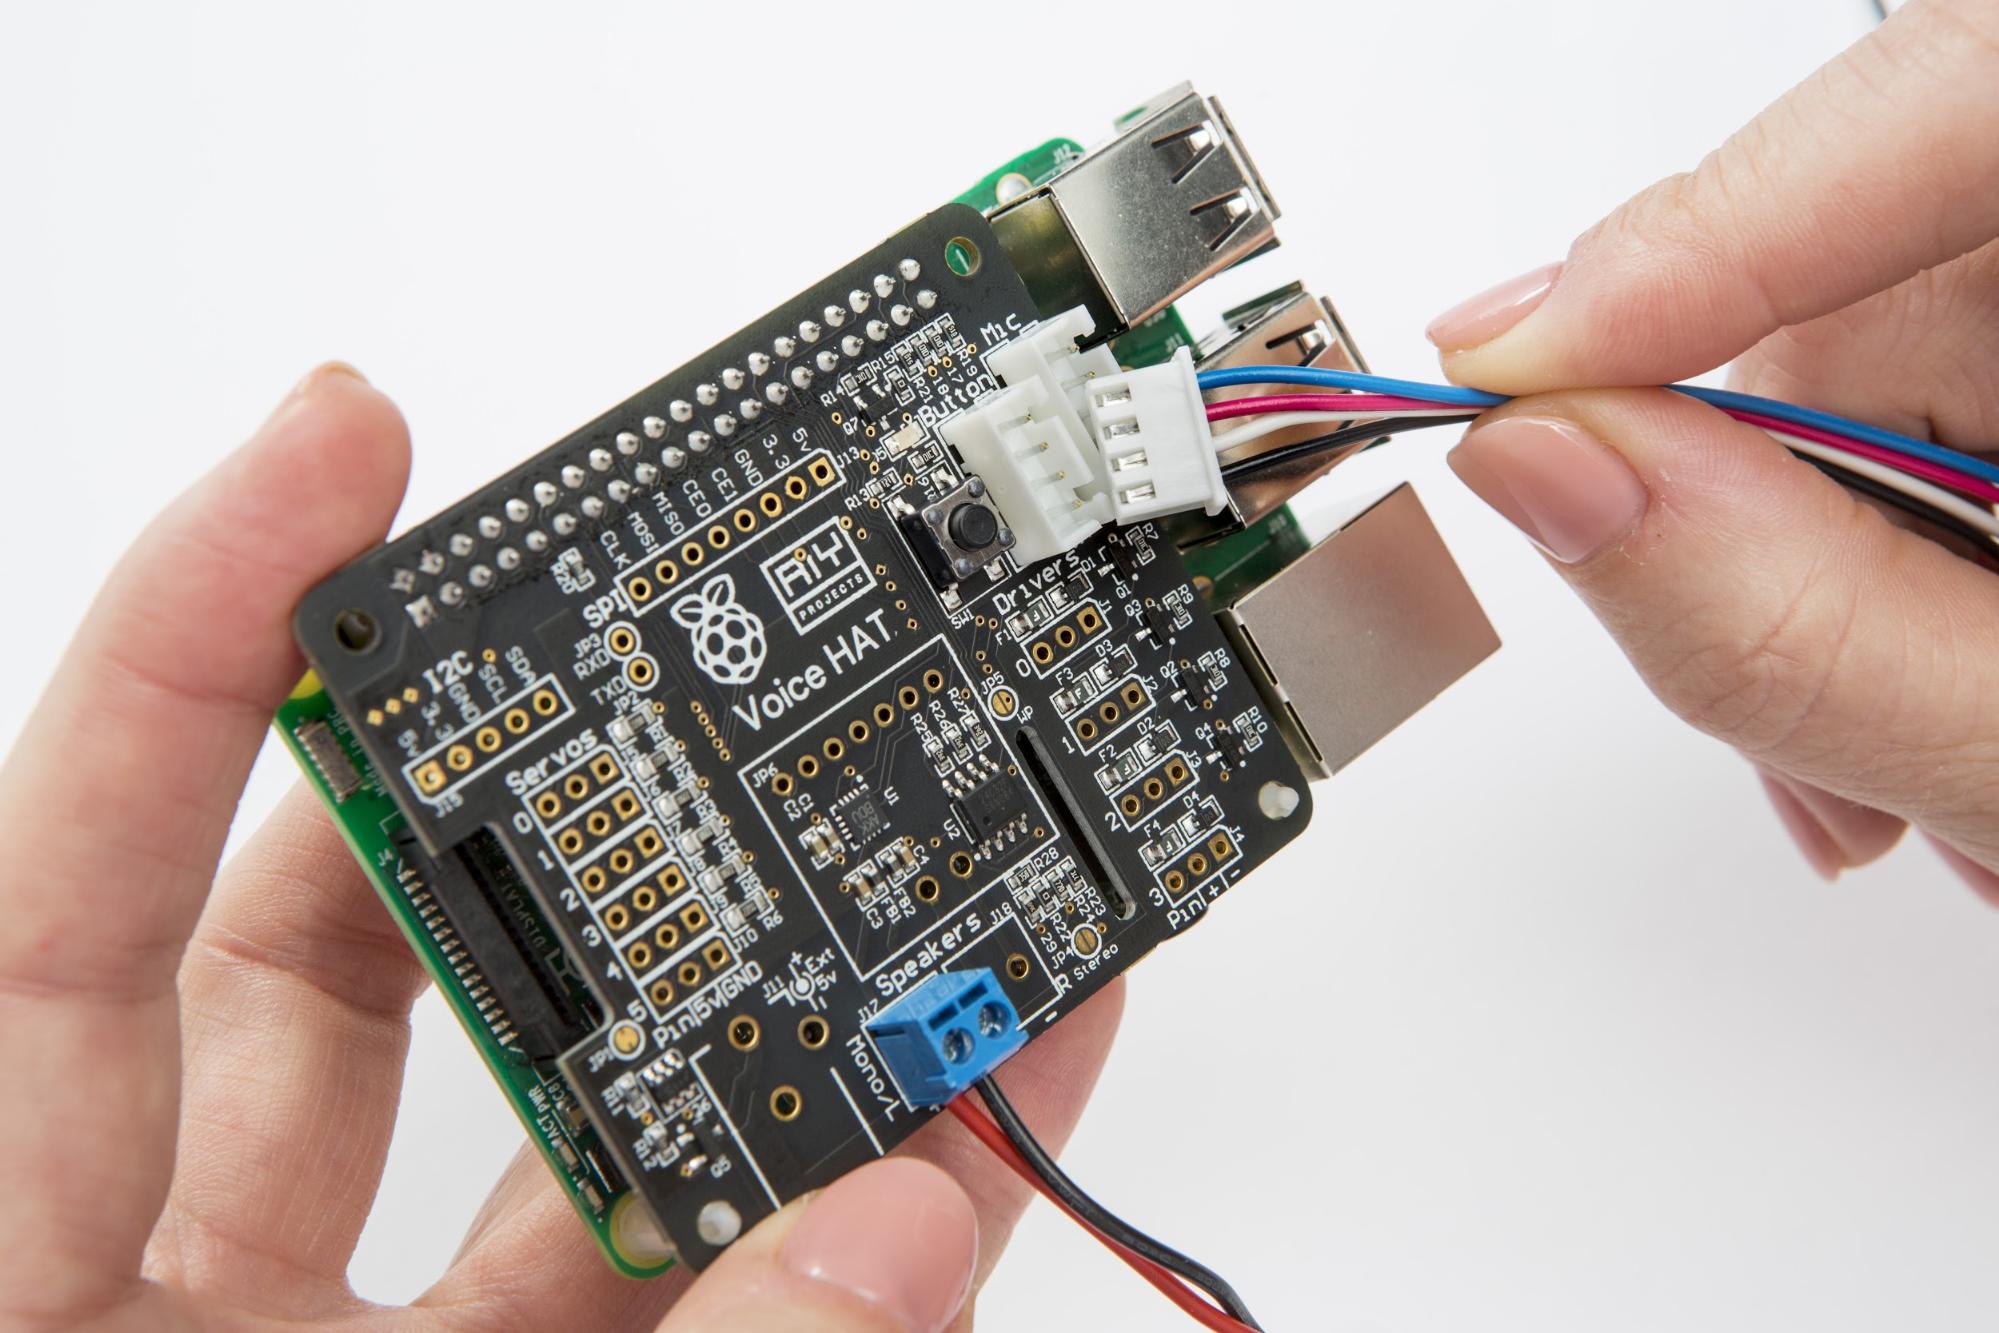
Find the 4-wire button cable: it has a white plug on one end and four separate wires with metal contacts on the other.
Insert the plug into the white connector labeled “Button” on the Voice HAT board.
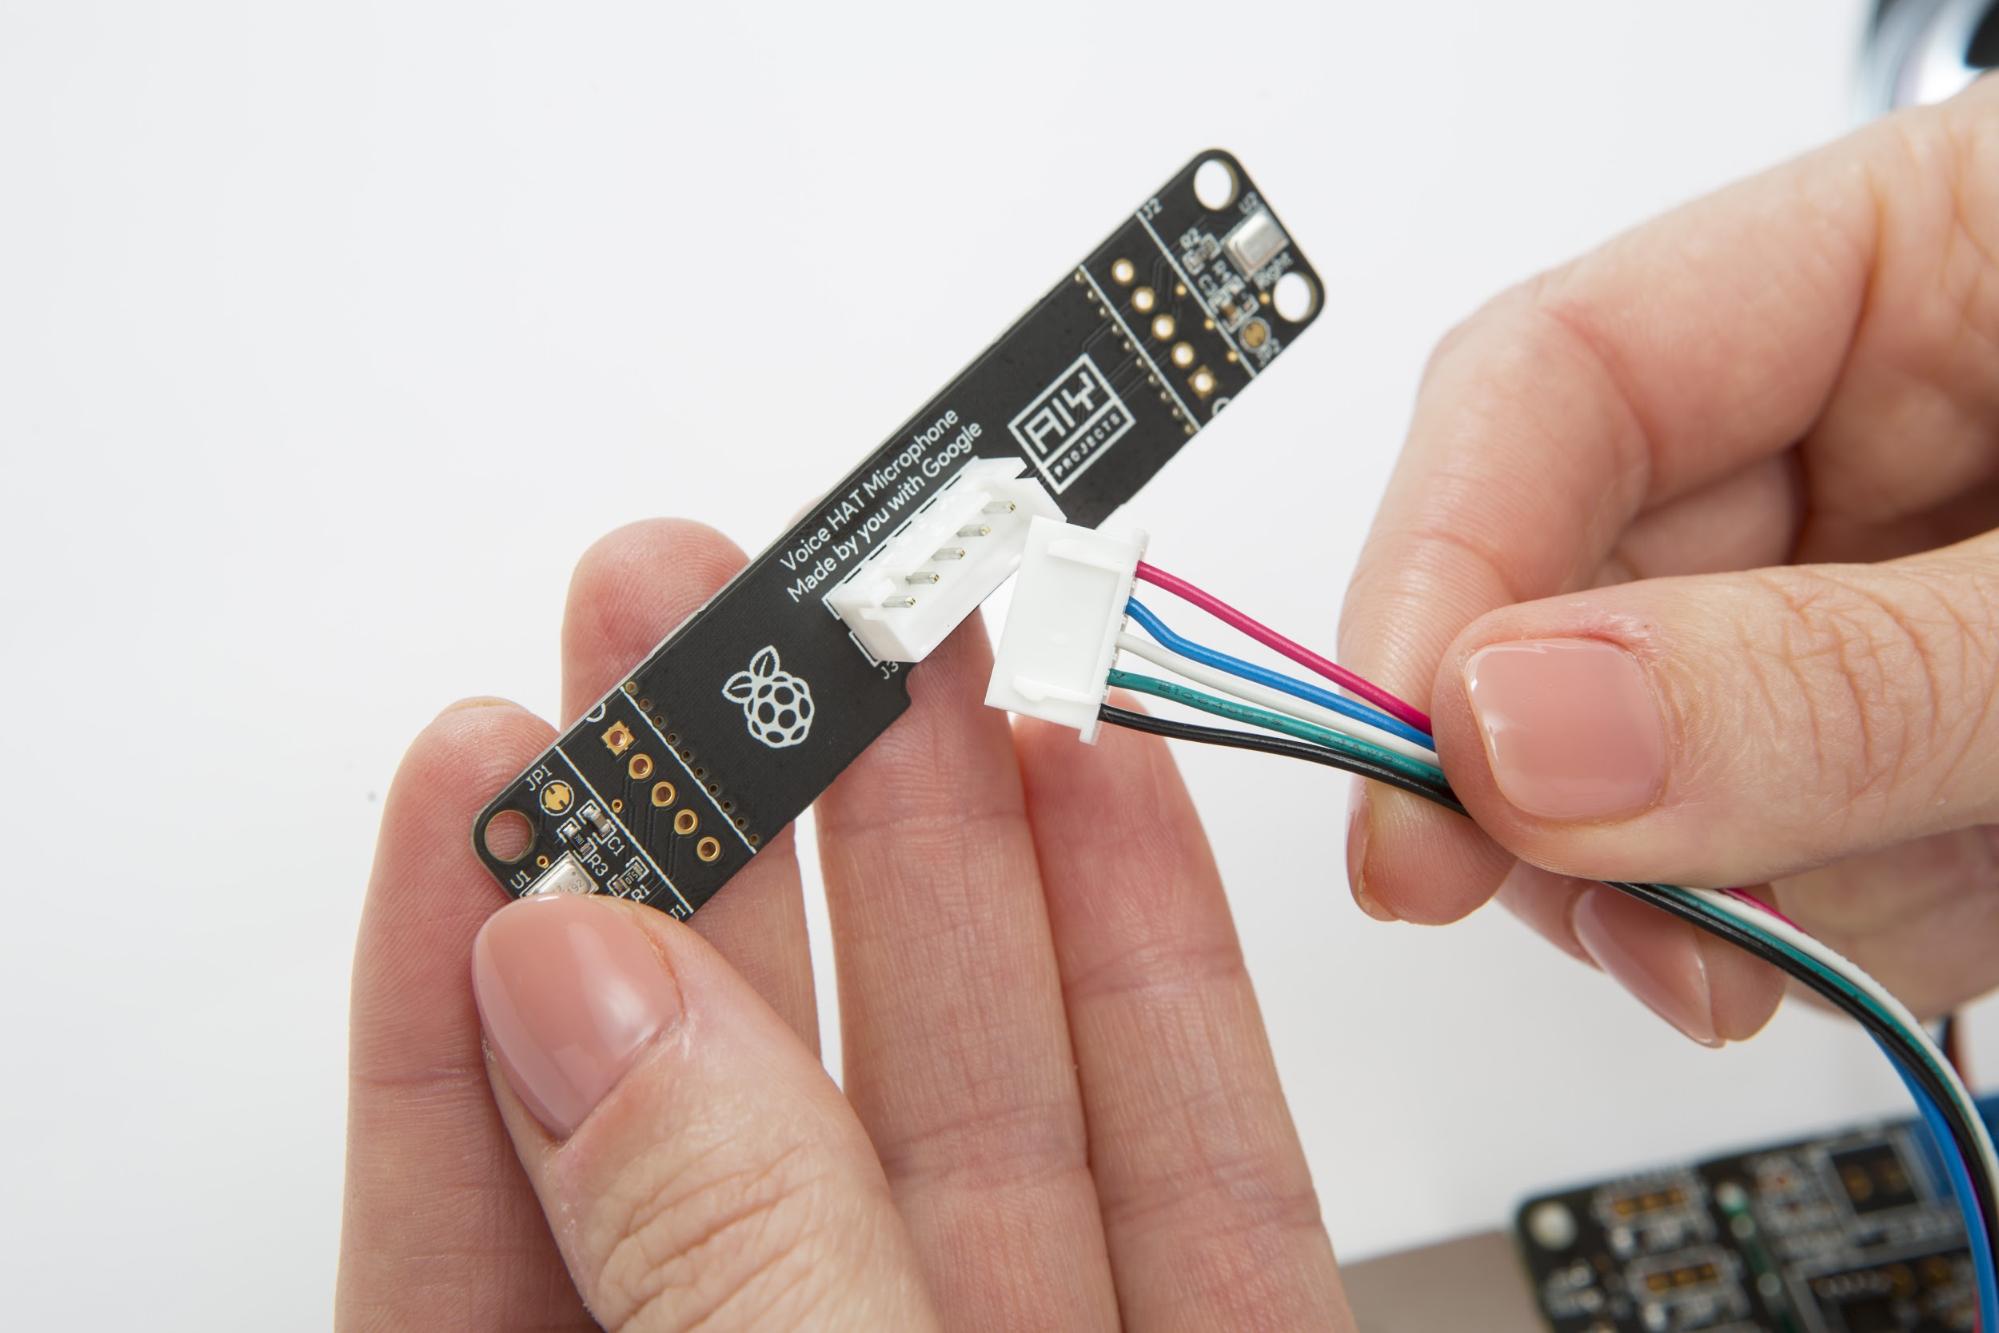
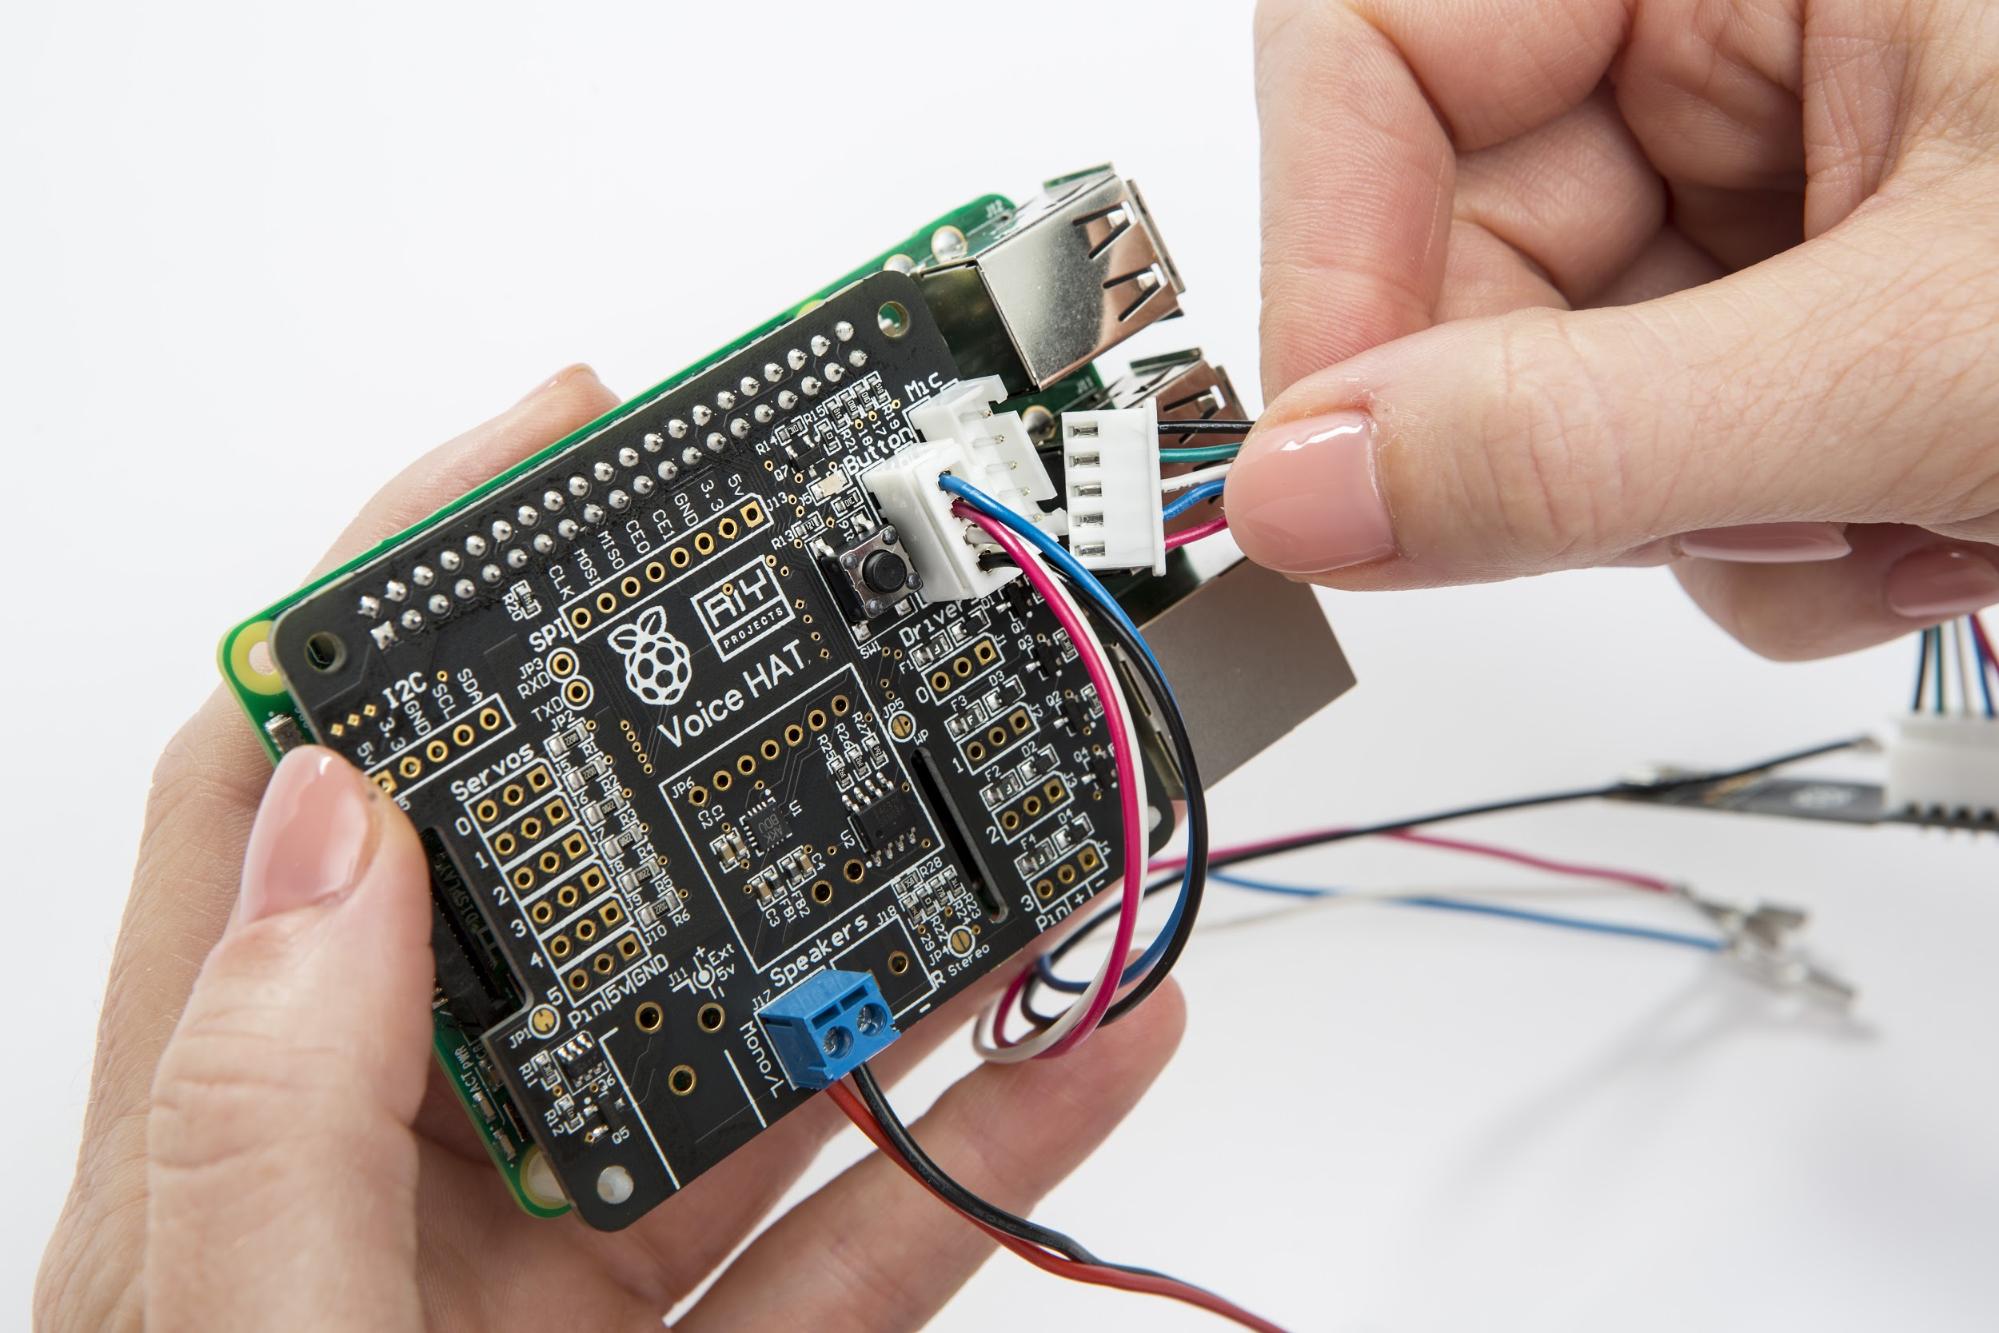
Find the Voice HAT Microphone board and the 5-wire daughter board cable from your kit (pictured).
Insert the 5-wire plug into the Microphone board.
Plug the Microphone board to the Voice Hat board using the white connector labeled “Mic.”
Well done! Set aside your hardware for now.
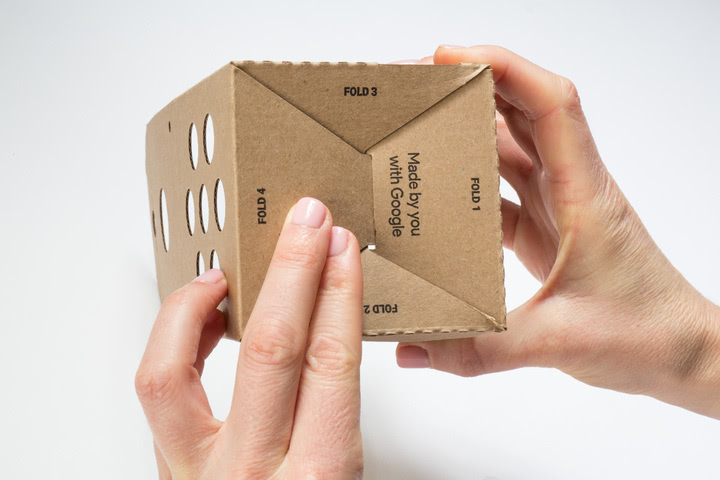
Now let’s build the box. Find the larger cardboard piece with a bunch of holes on one side (pictured).
Fold along the creases, then find the side with four flaps and fold the one marked FOLD 1.
Do the same for the other folds, tucking FOLD 4 underneath to secure it in place.
Easy! Now set it aside.
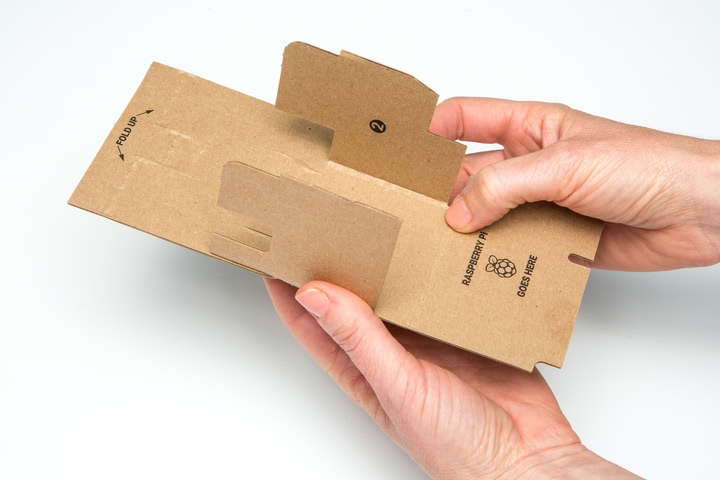
Find the other cardboard piece that came with your kit (pictured). This will build the inner frame to hold the hardware.
Fold the flaps labeled 1 and 2 along the creases.
The flap above the 1 and 2 folds has a U-shaped cutout. Push it out.
Then fold the rest of the flap outward.
Fold the section labeled FOLD UP so that it’s flush with the surface you’re working on. There’s a little notch that folds behind the U-shaped flap to keep it in place.
The U-shaped flap should lay flush with the box side.
At this point, the cardboard might not hold its shape. Don’t worry: it’ll come together once it’s in the box.
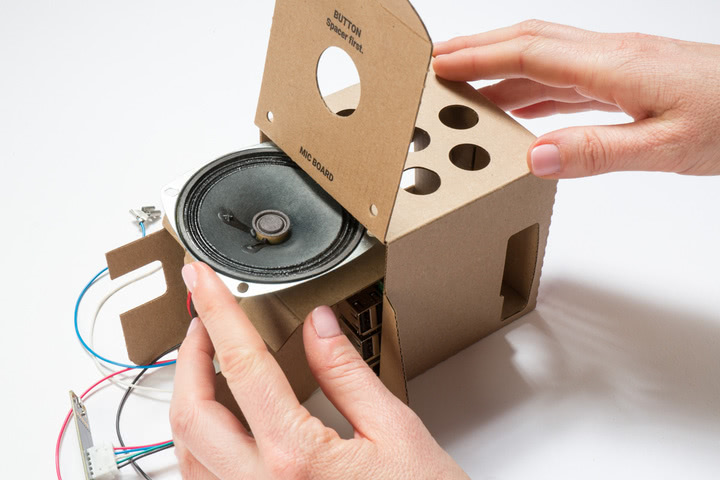
Find your speaker (which is now attached to your Raspberry Pi 3).
Slide the speaker into the U-shaped pocket on the cardboard frame.
Turn the cardboard frame around.
Take the Pi + Voice HAT hardware and slide the it into the bottom of the frame below flaps 1 + 2 (pictured).
The USB ports on the Pi should be exposed from the cardboard frame.
If your SD card is already inserted into the Pi, remove the SD card before sliding the hardware into the cardboard or it may break.
Let’s put it all together!
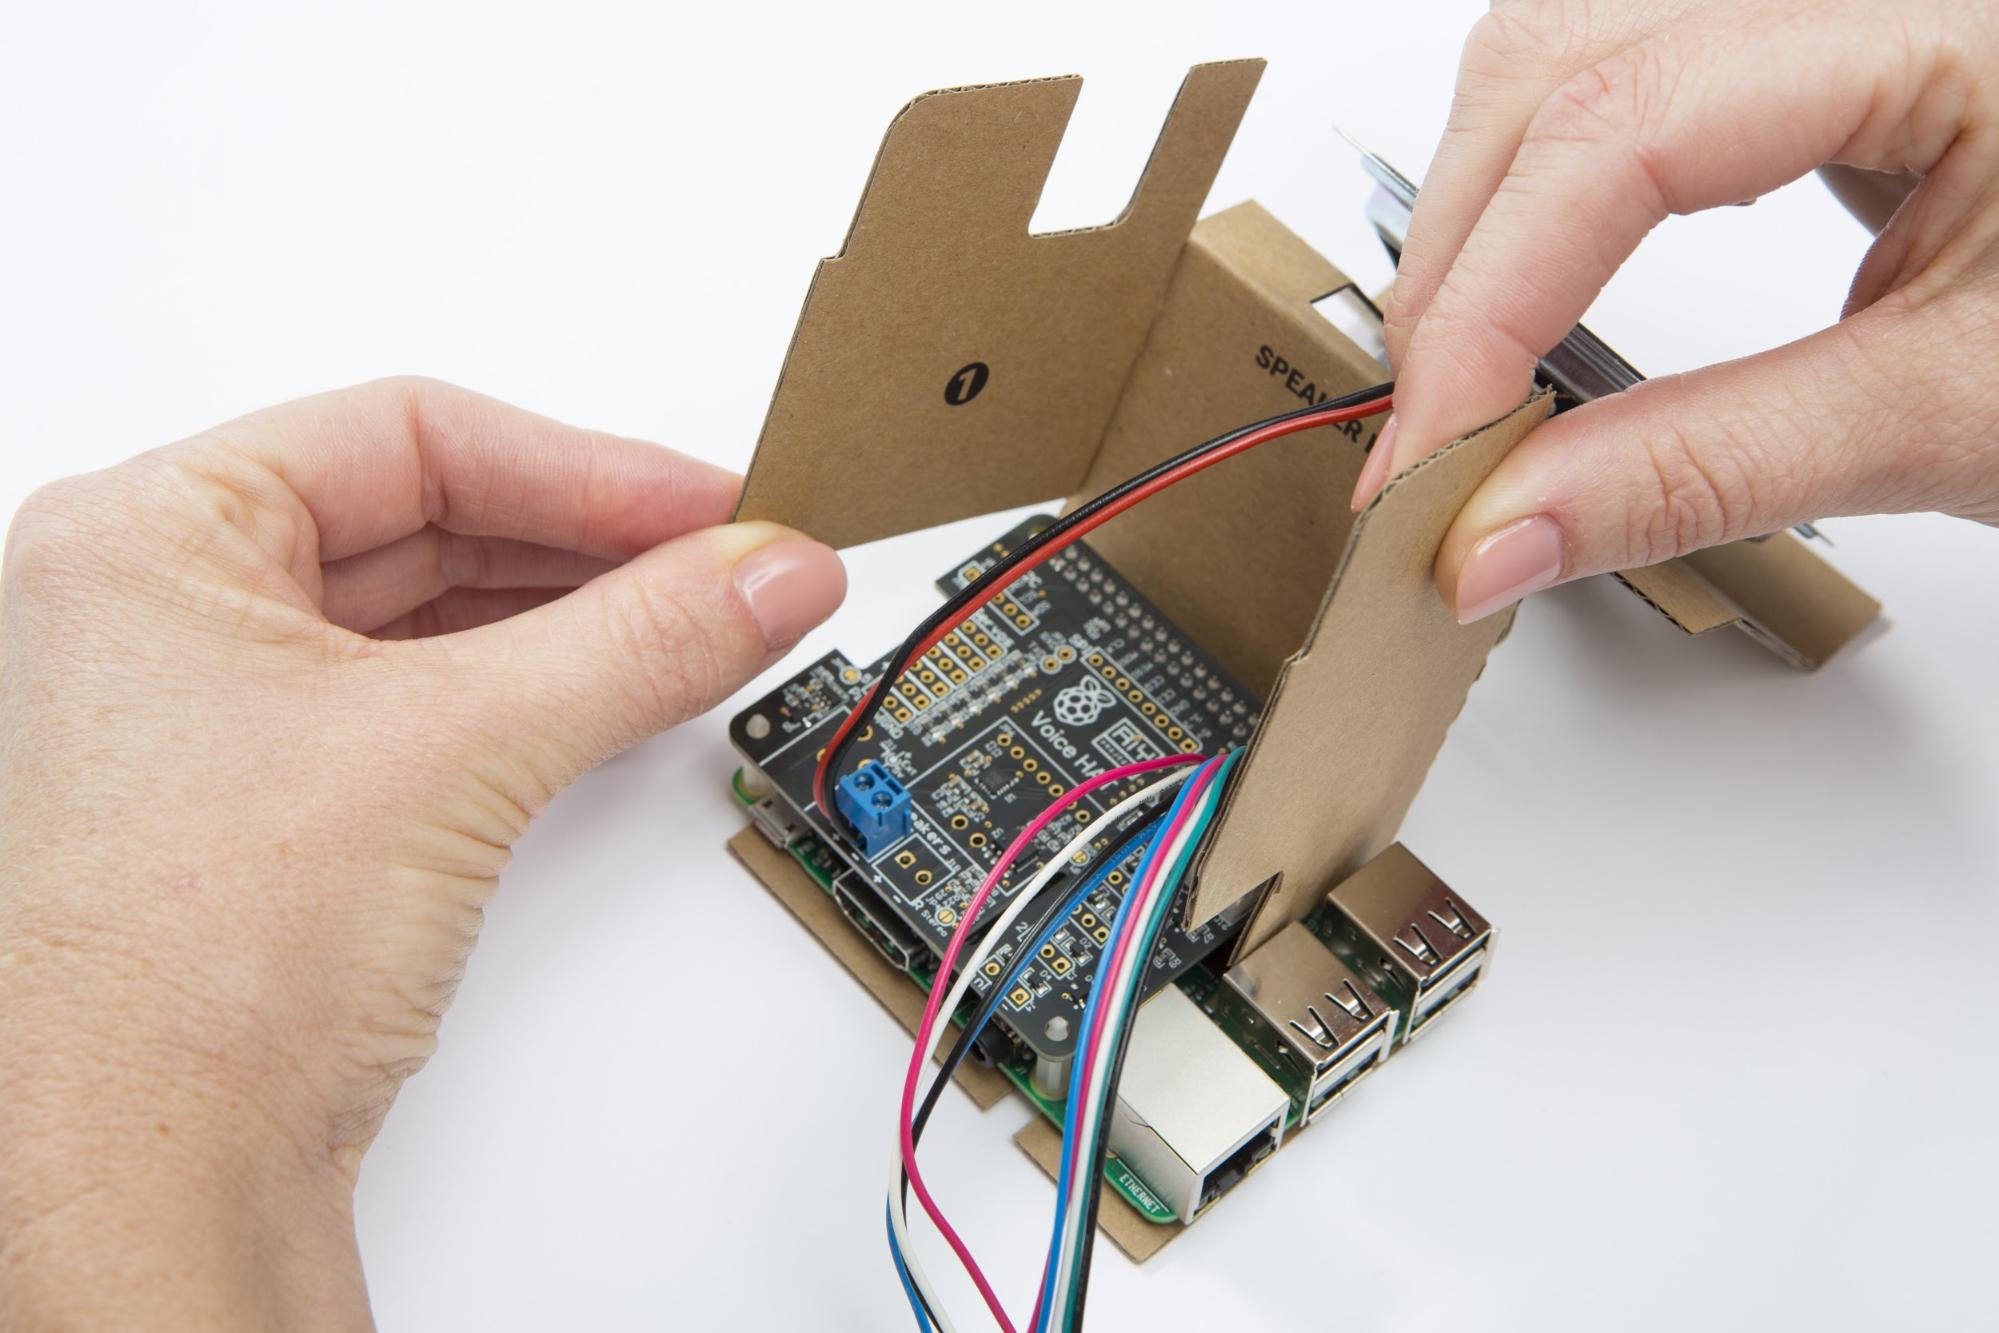
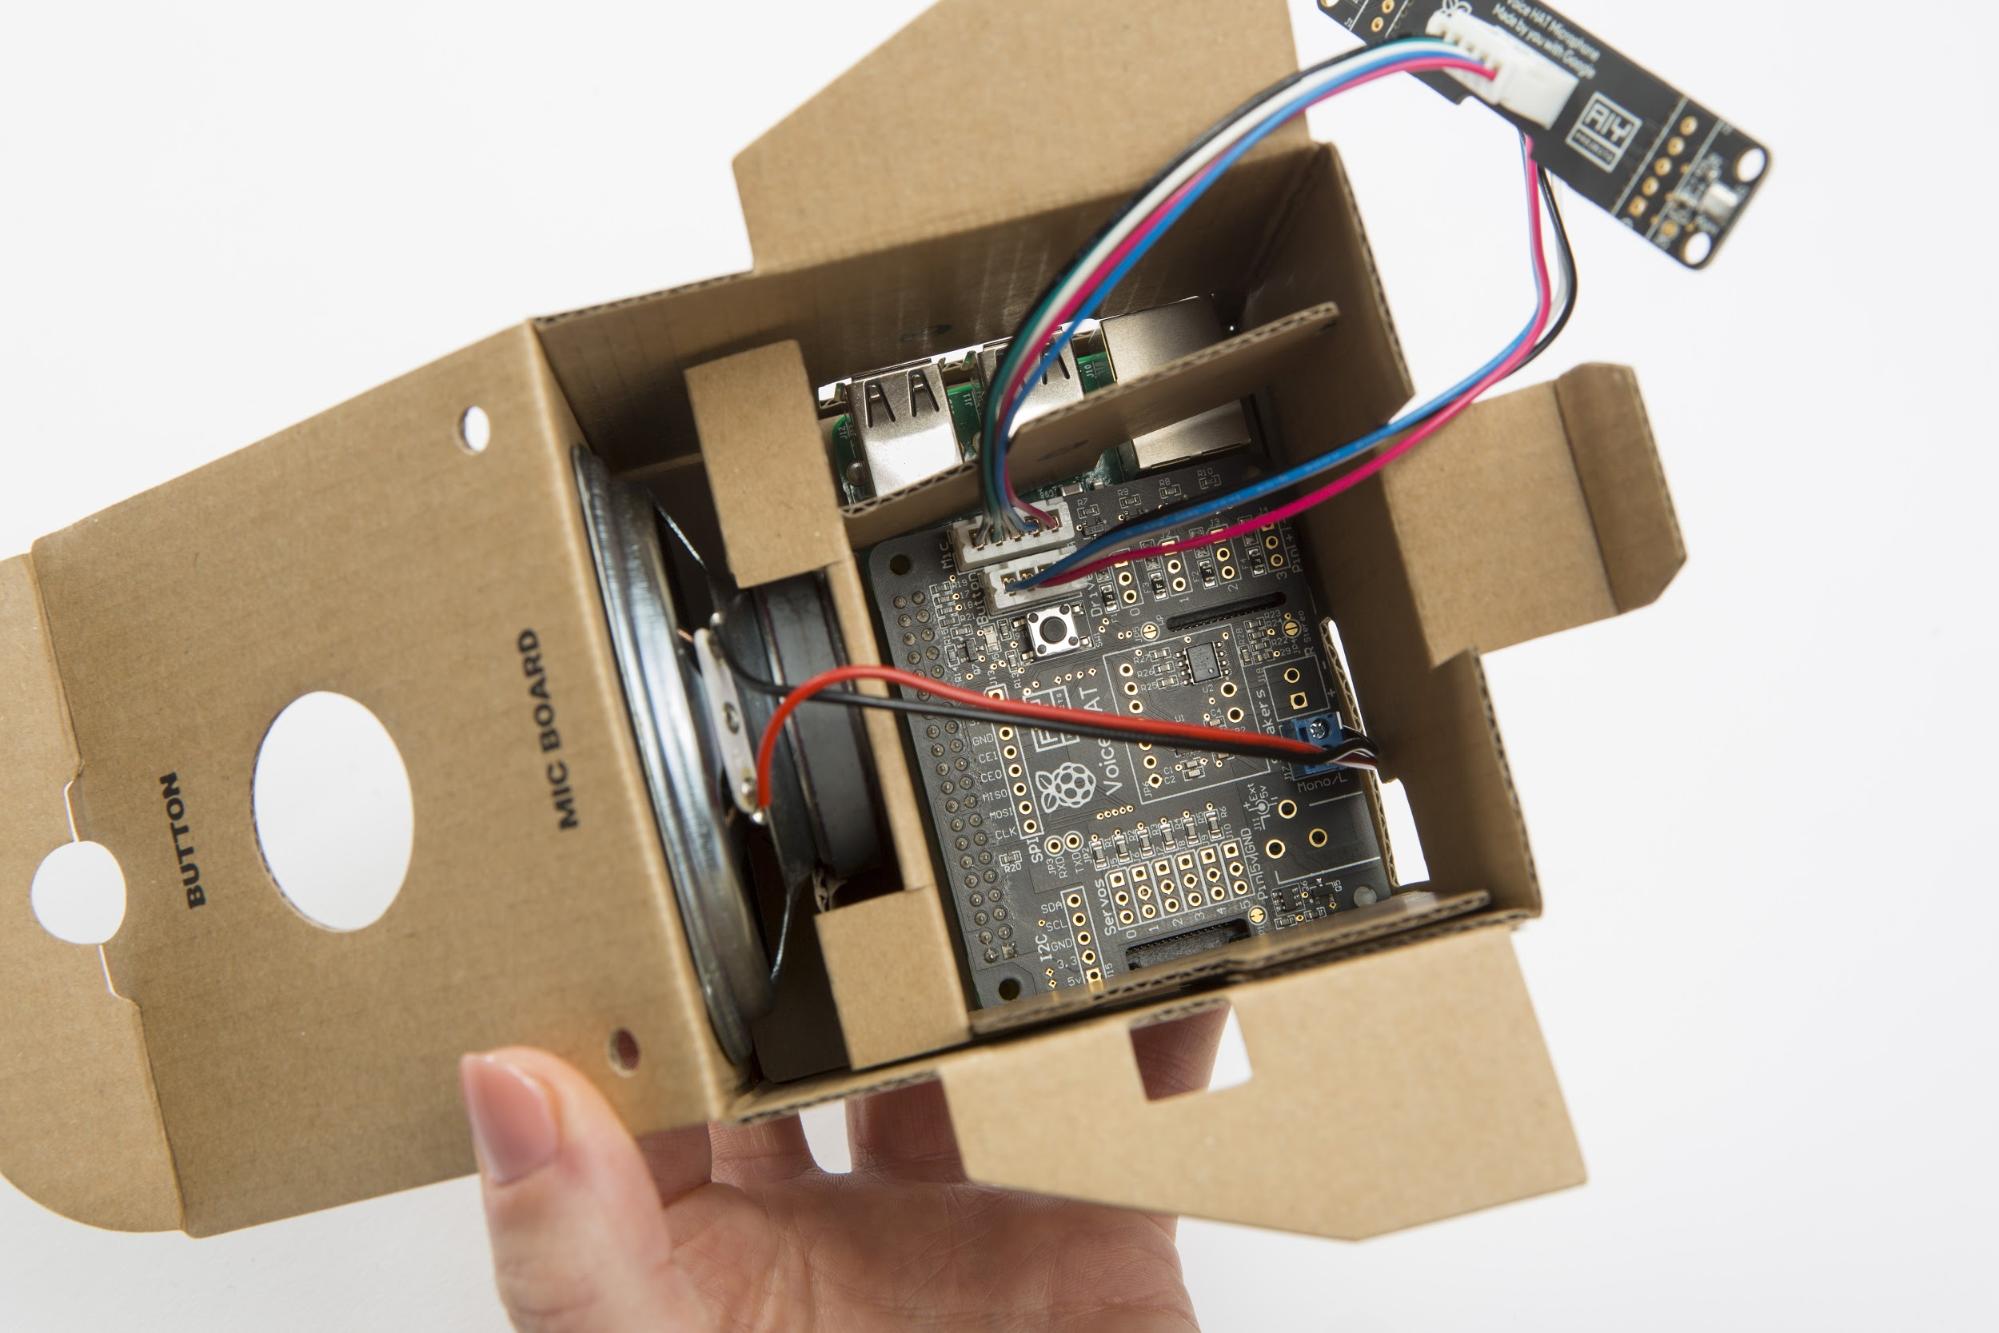
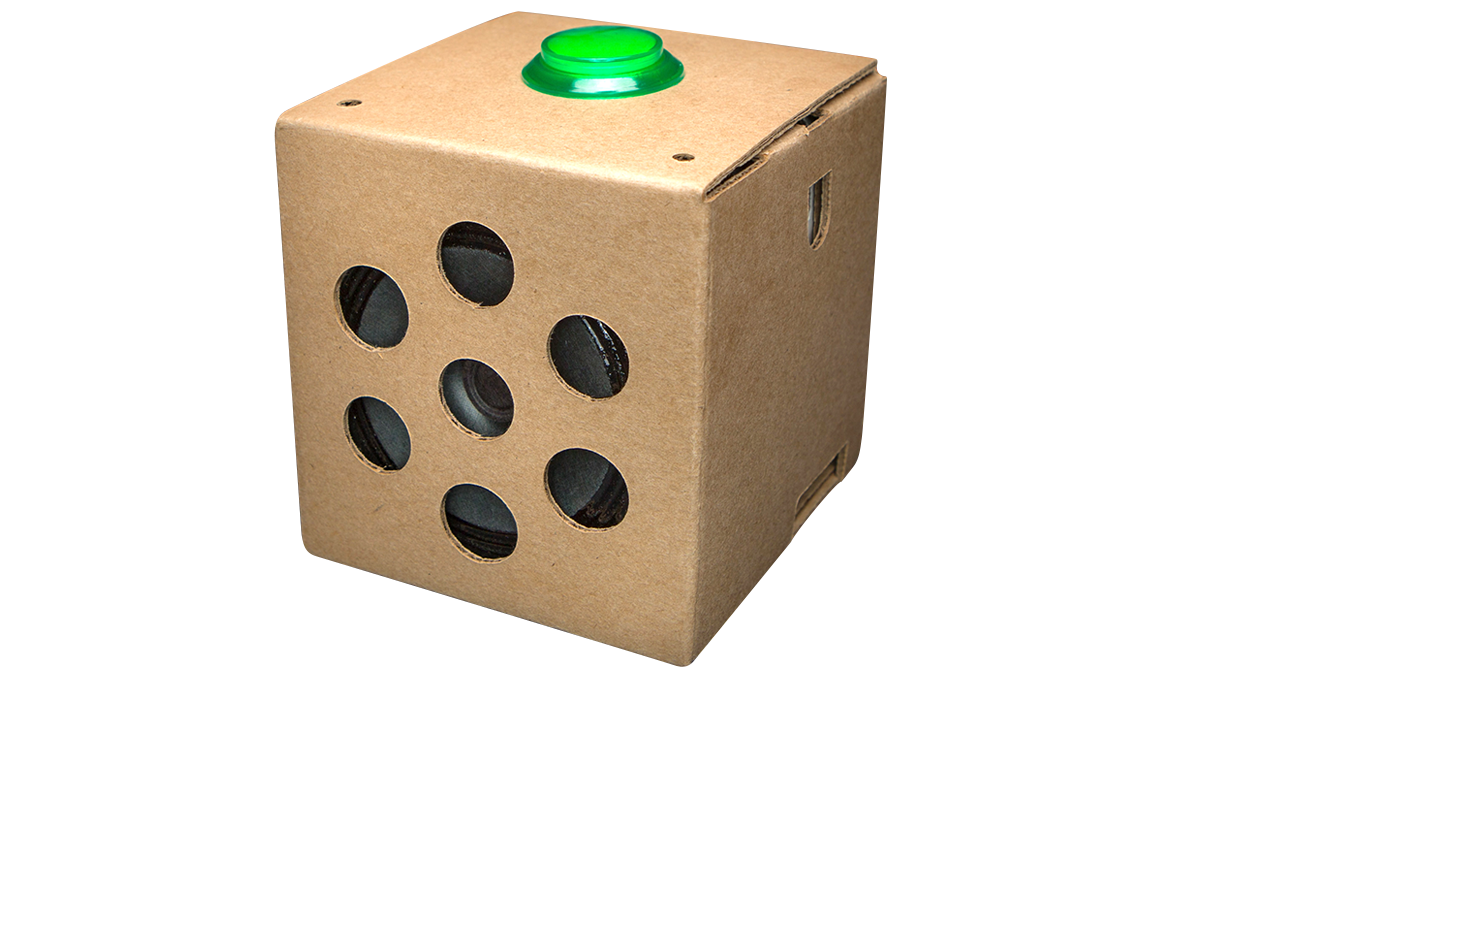
Take the cardboard box you assembled earlier and find the side with the seven speaker holes.
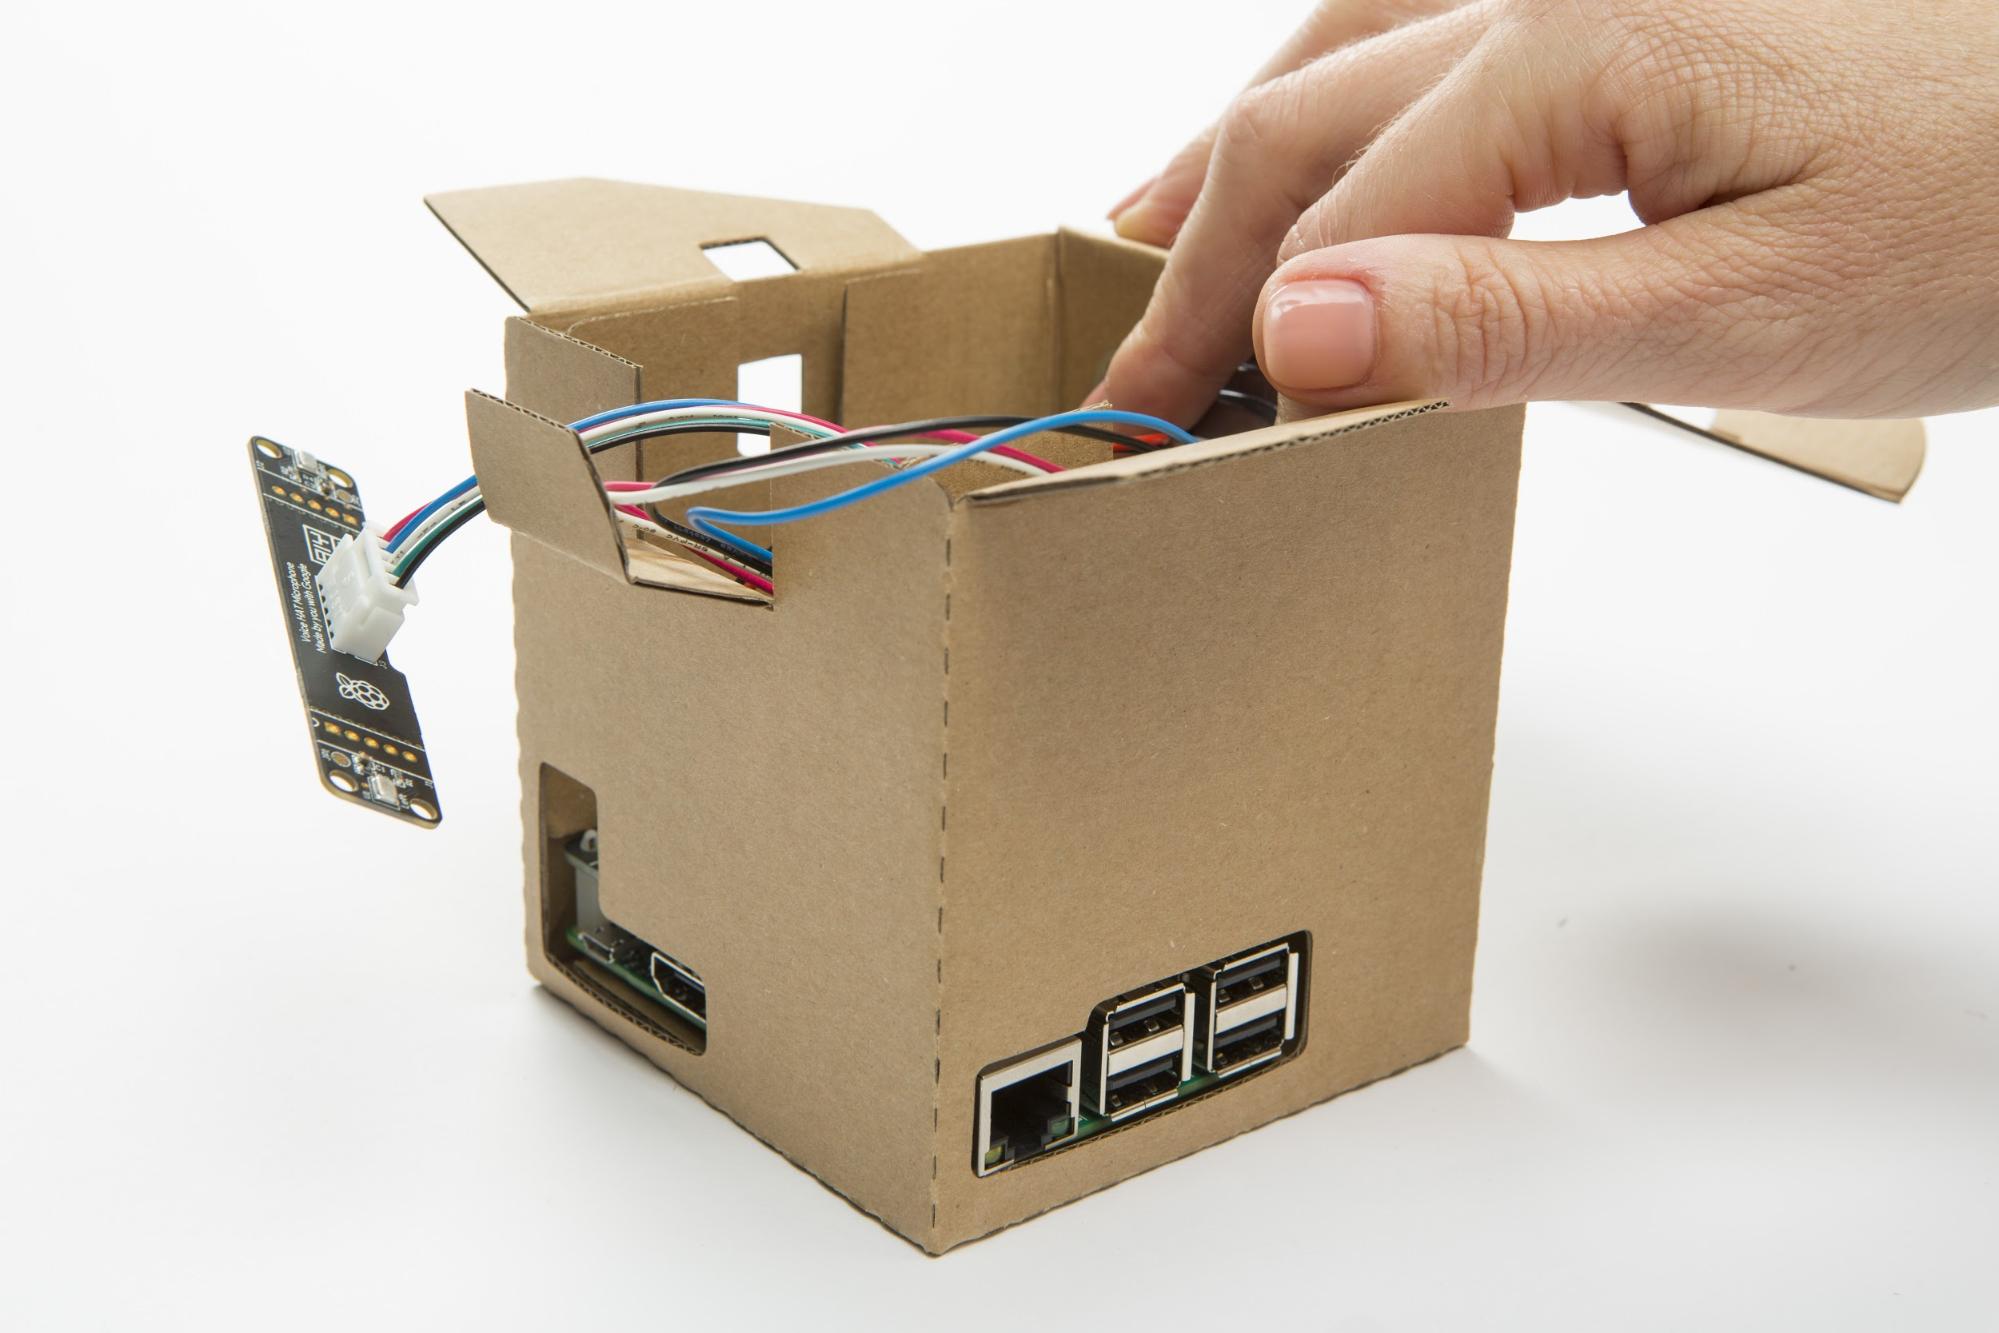
Slide the cardboard frame + hardware into the cardboard box, making sure that the speaker is aligned with the box side with the speaker holes.
Once it’s in, the Pi should be sitting on the bottom of the box.
Make sure your wires are still connected.
Check that your ports are aligned with the cardboard box holes.
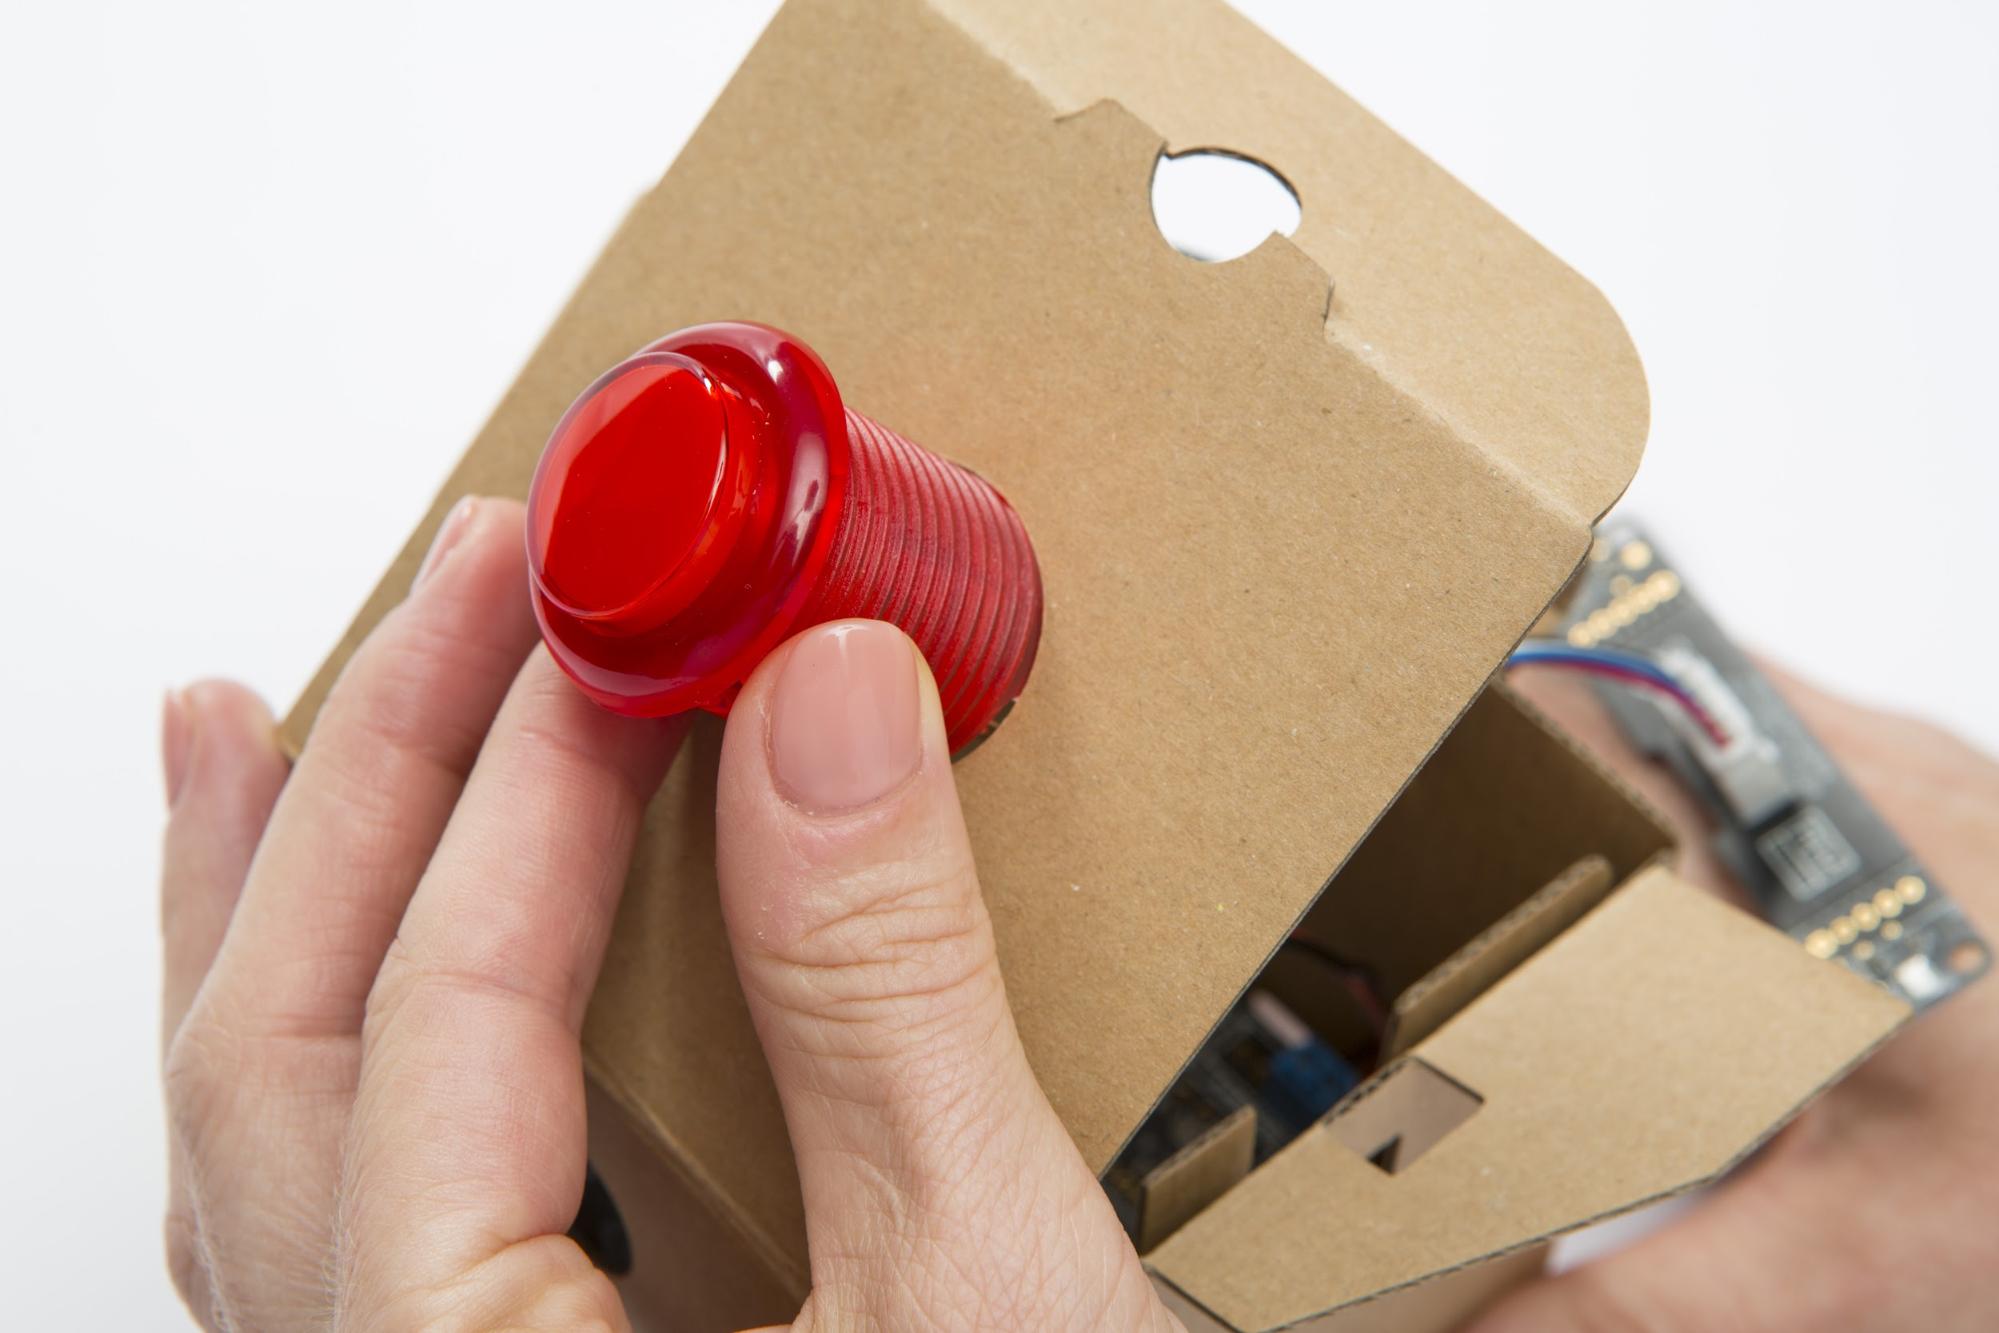
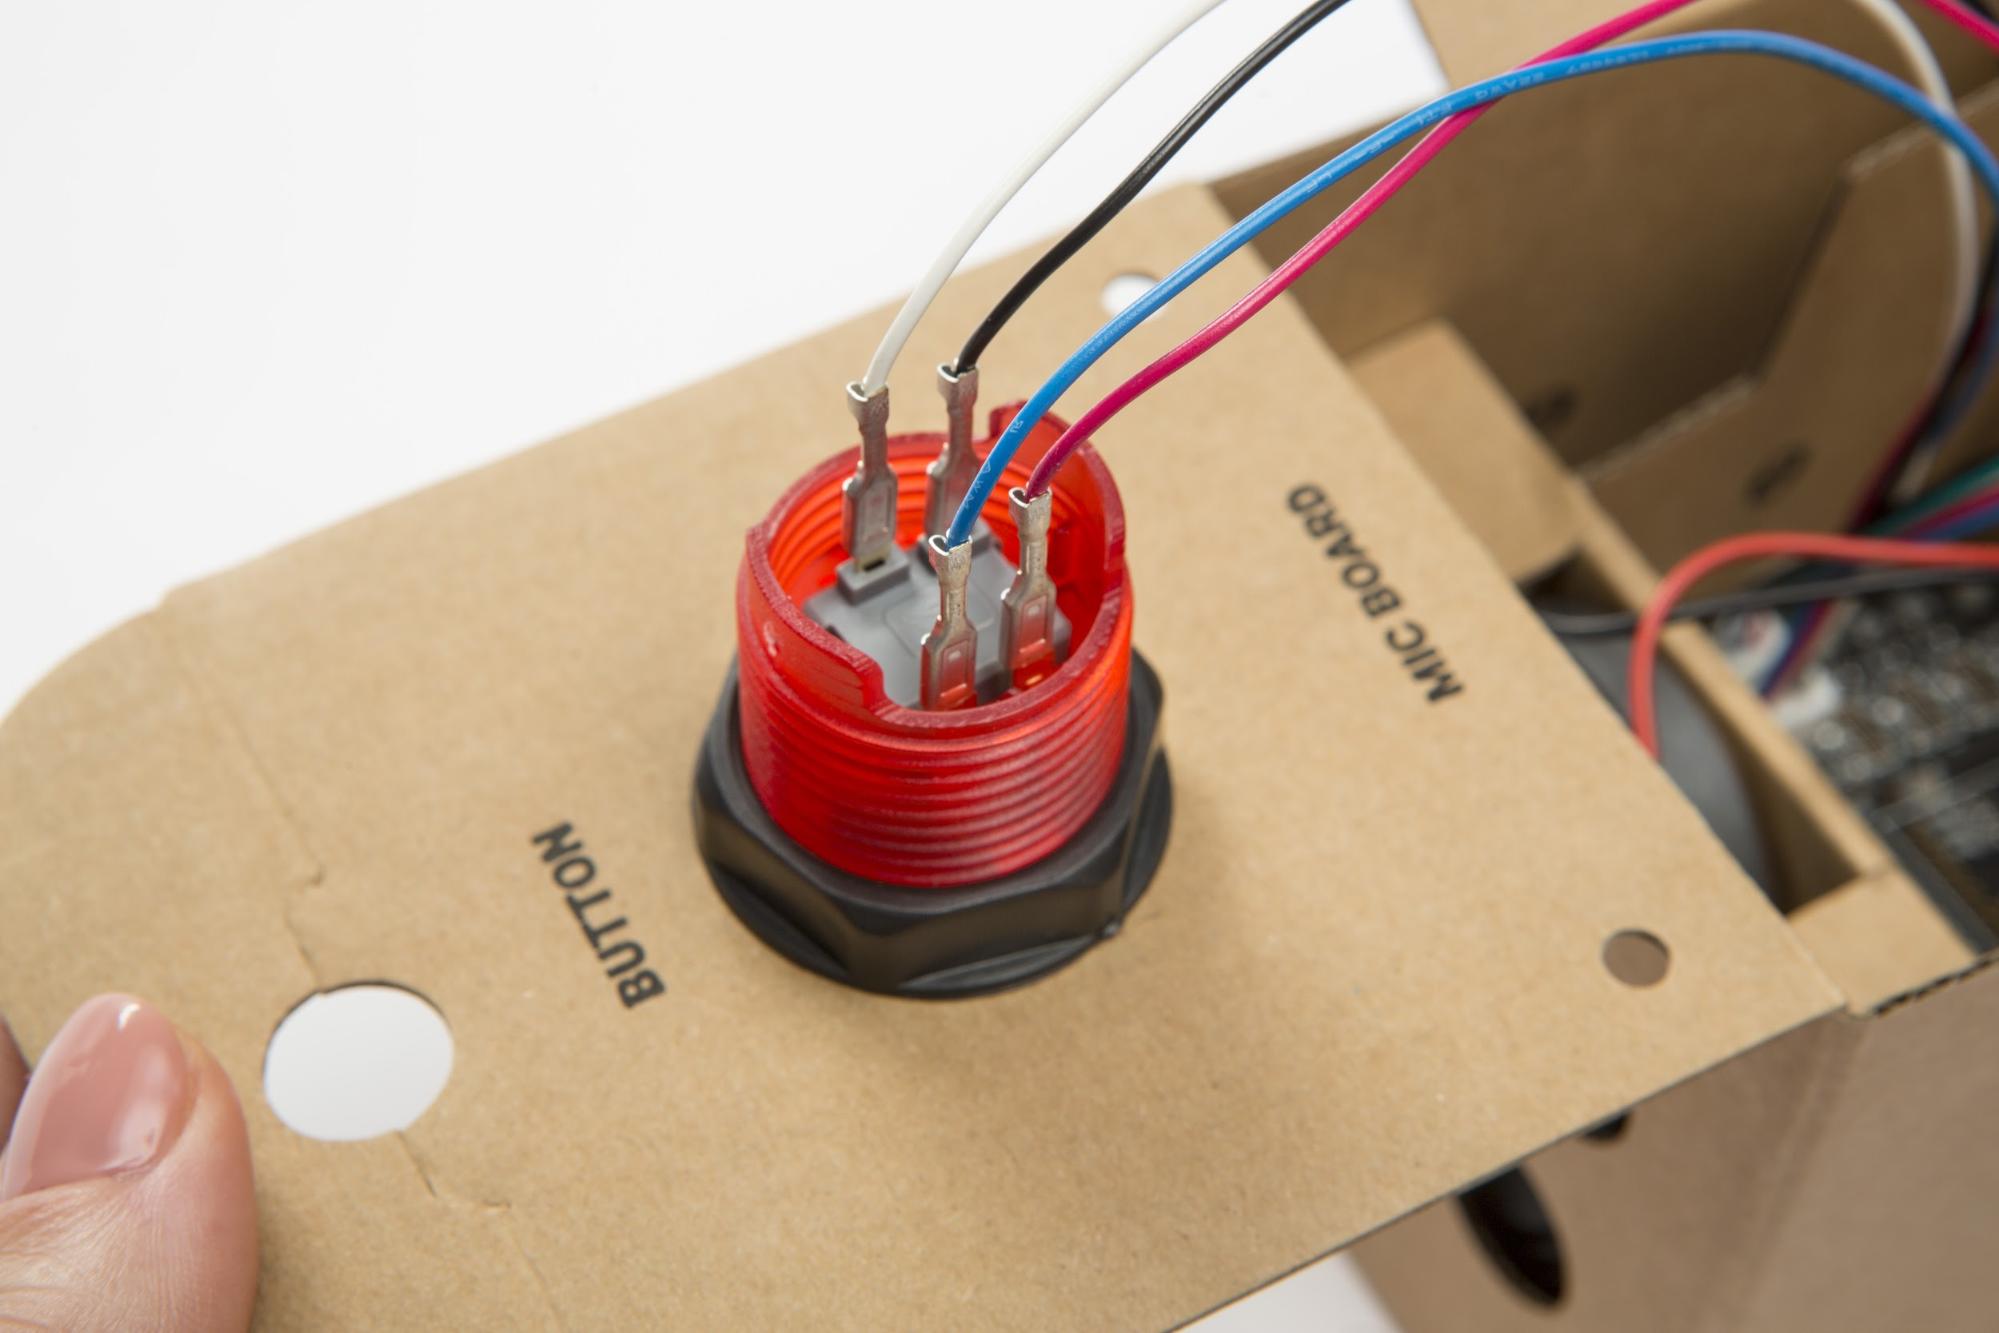
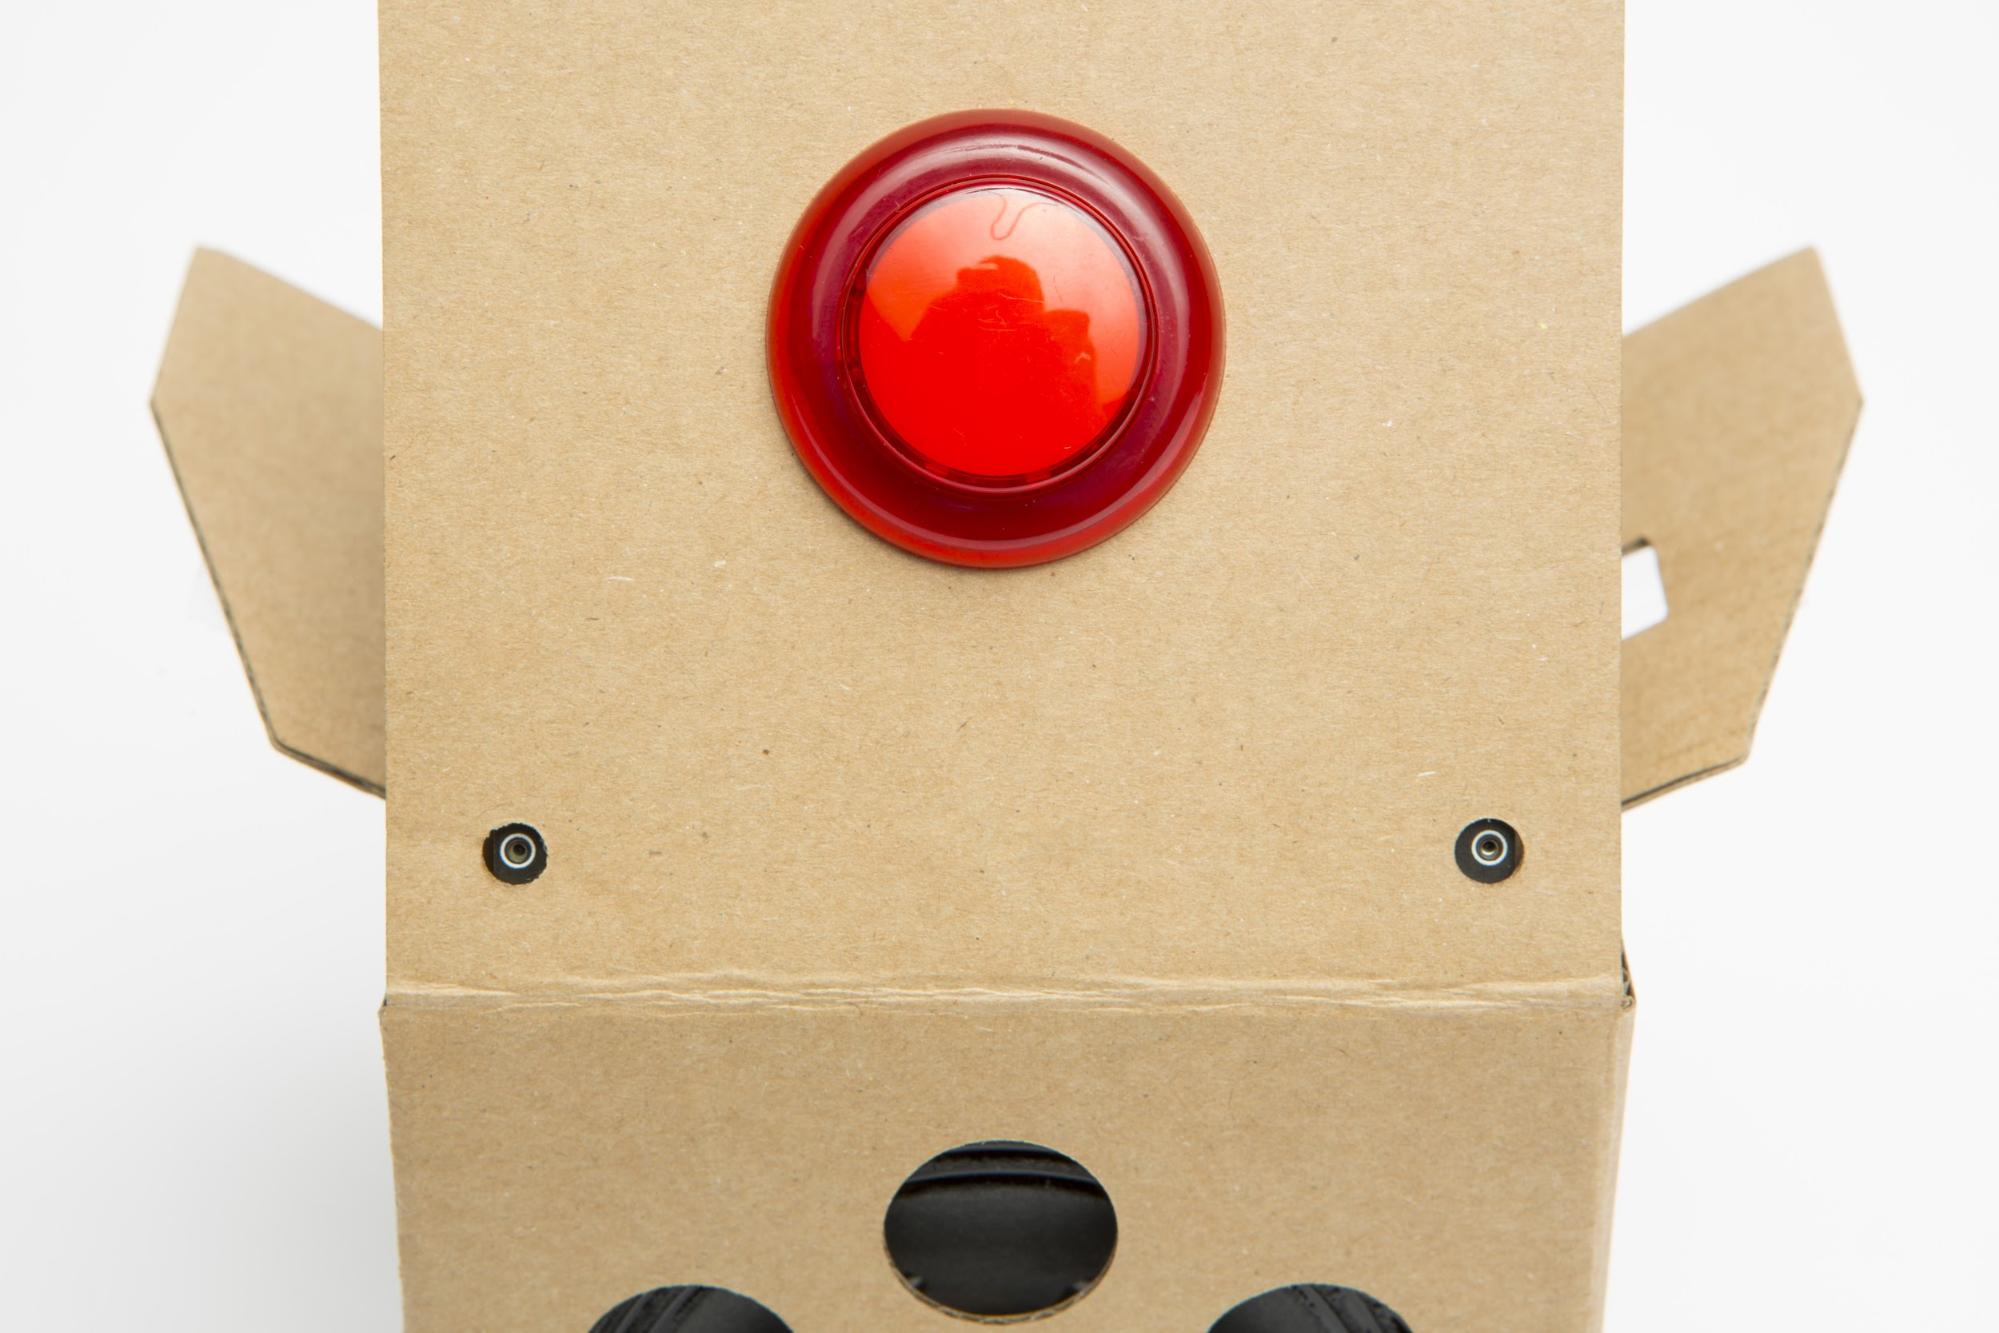
Find your arcade button and set it into the top of your cardboard box.
On the other side, screw on the washer to secure the button in place.
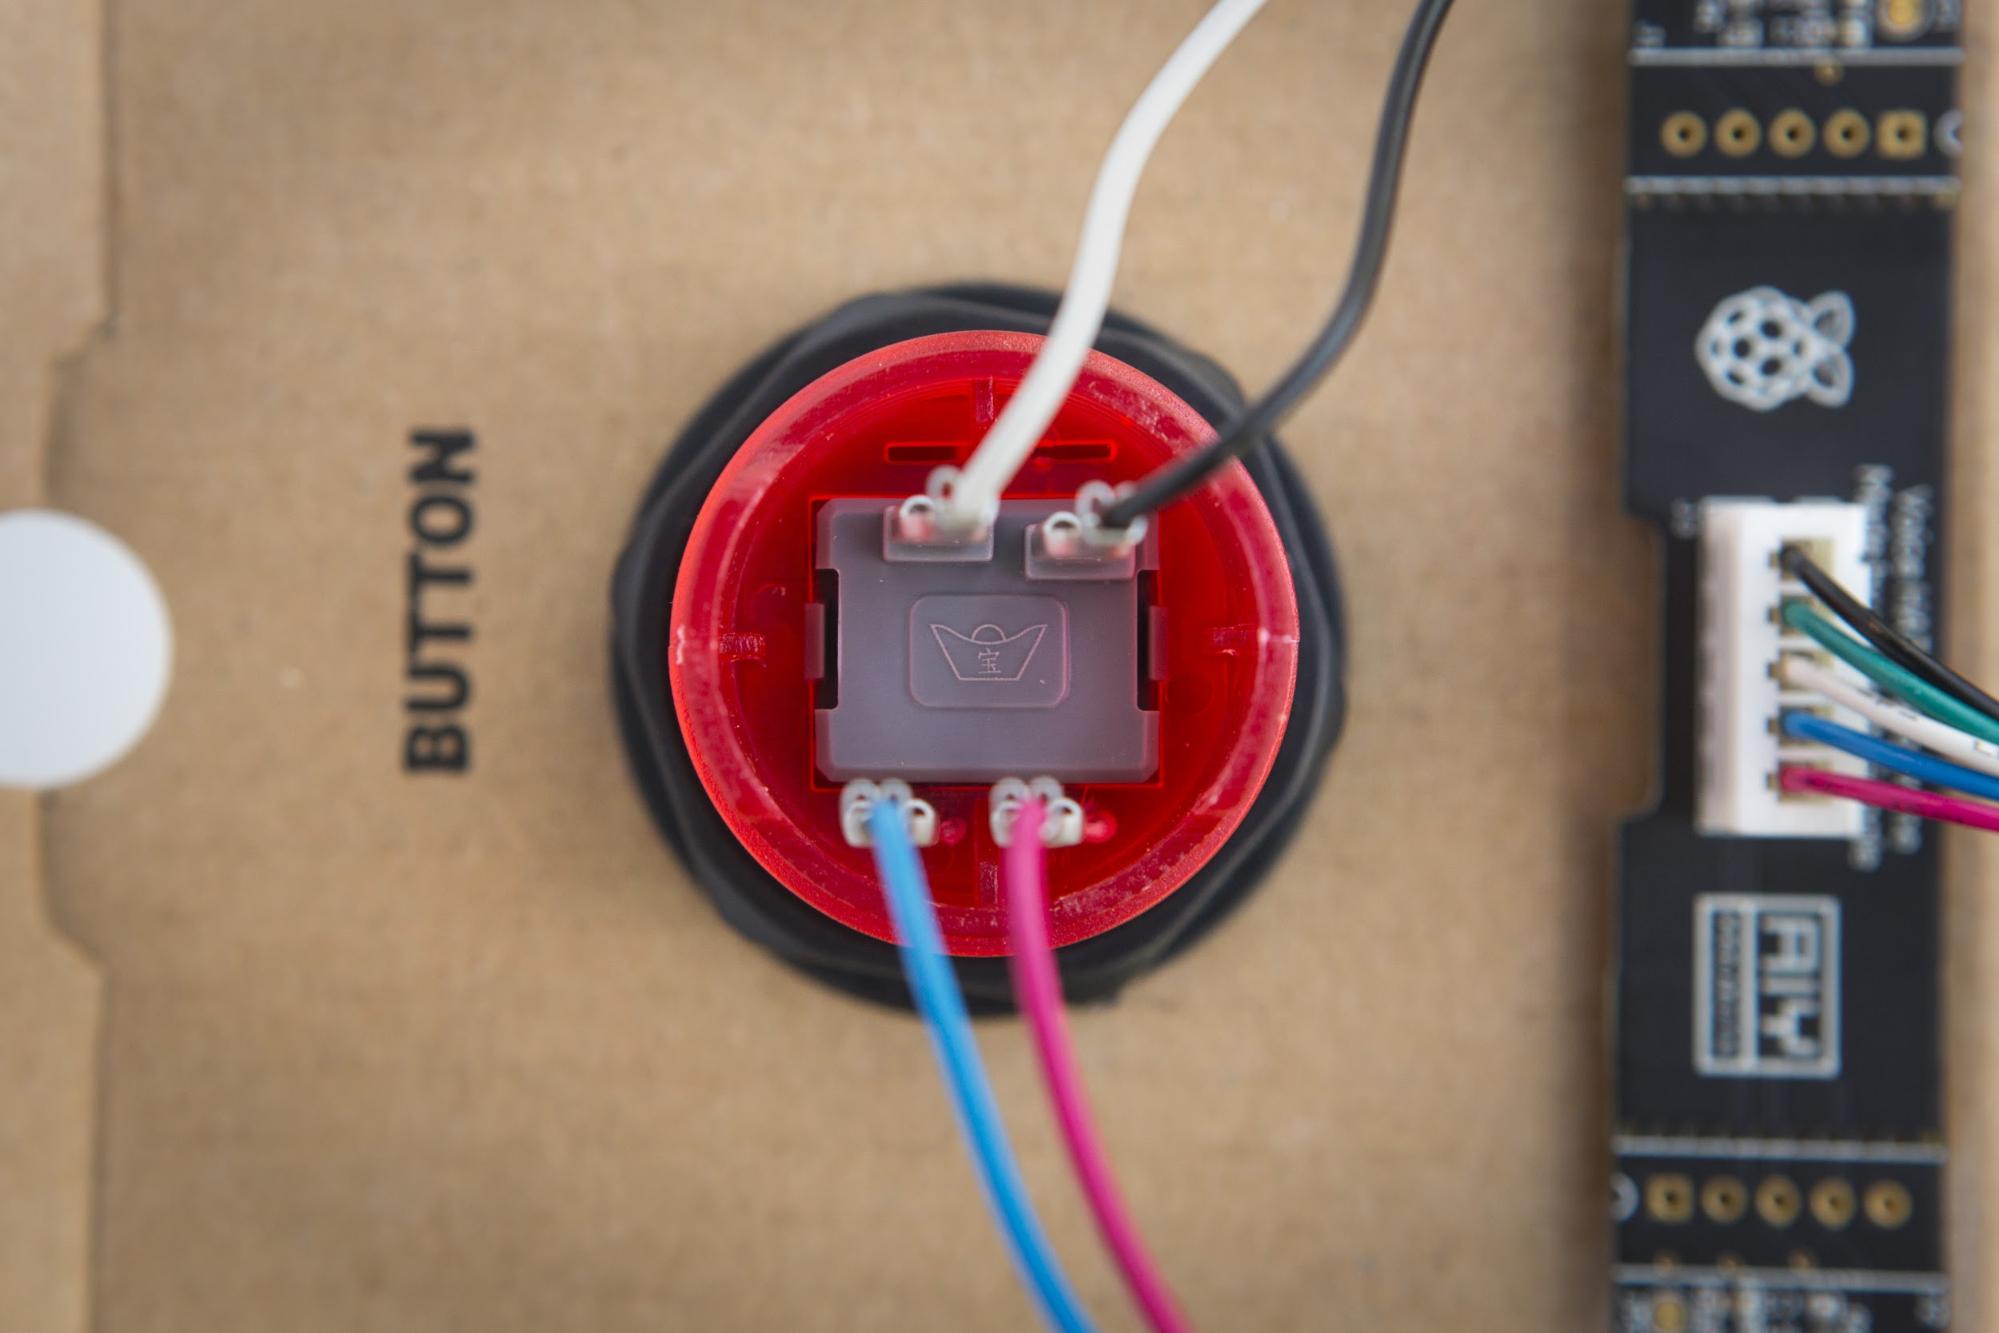
Now let’s hook the button up. Find the four colored wires with metal contacts connected to the Voice HAT board. Connect the wires in the positions indicated by the image. Check the next step for another view.
Important: Wire color position matters! Check the next step to make sure your wires are correctly placed.
Here’s another view to make sure your wires are correctly connected.
Looking at the small crown logo (the base of the crown facing toward you), the wires should be connected at these locations:
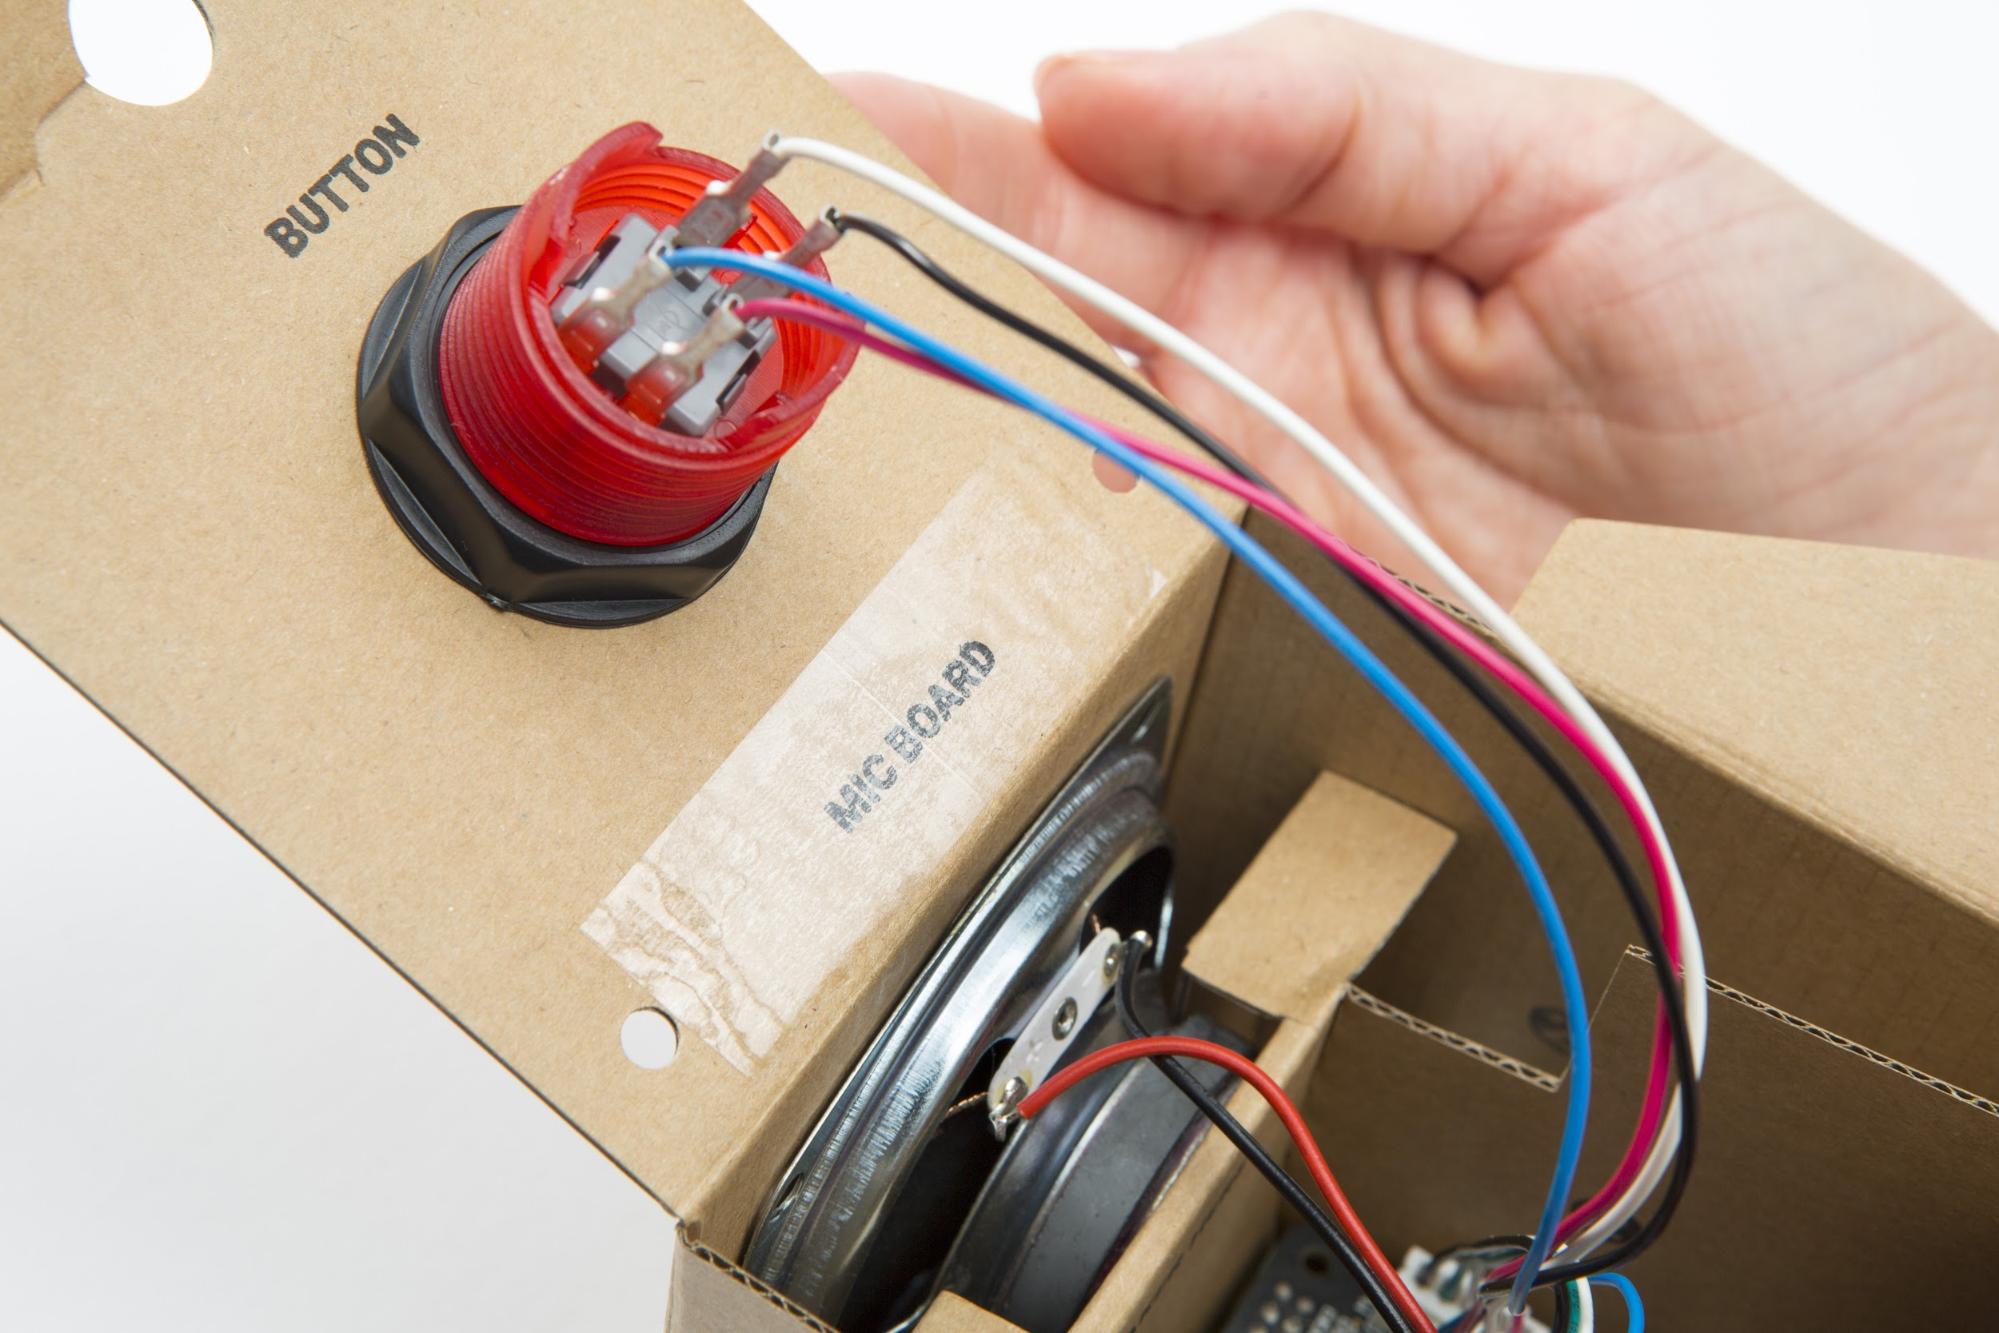
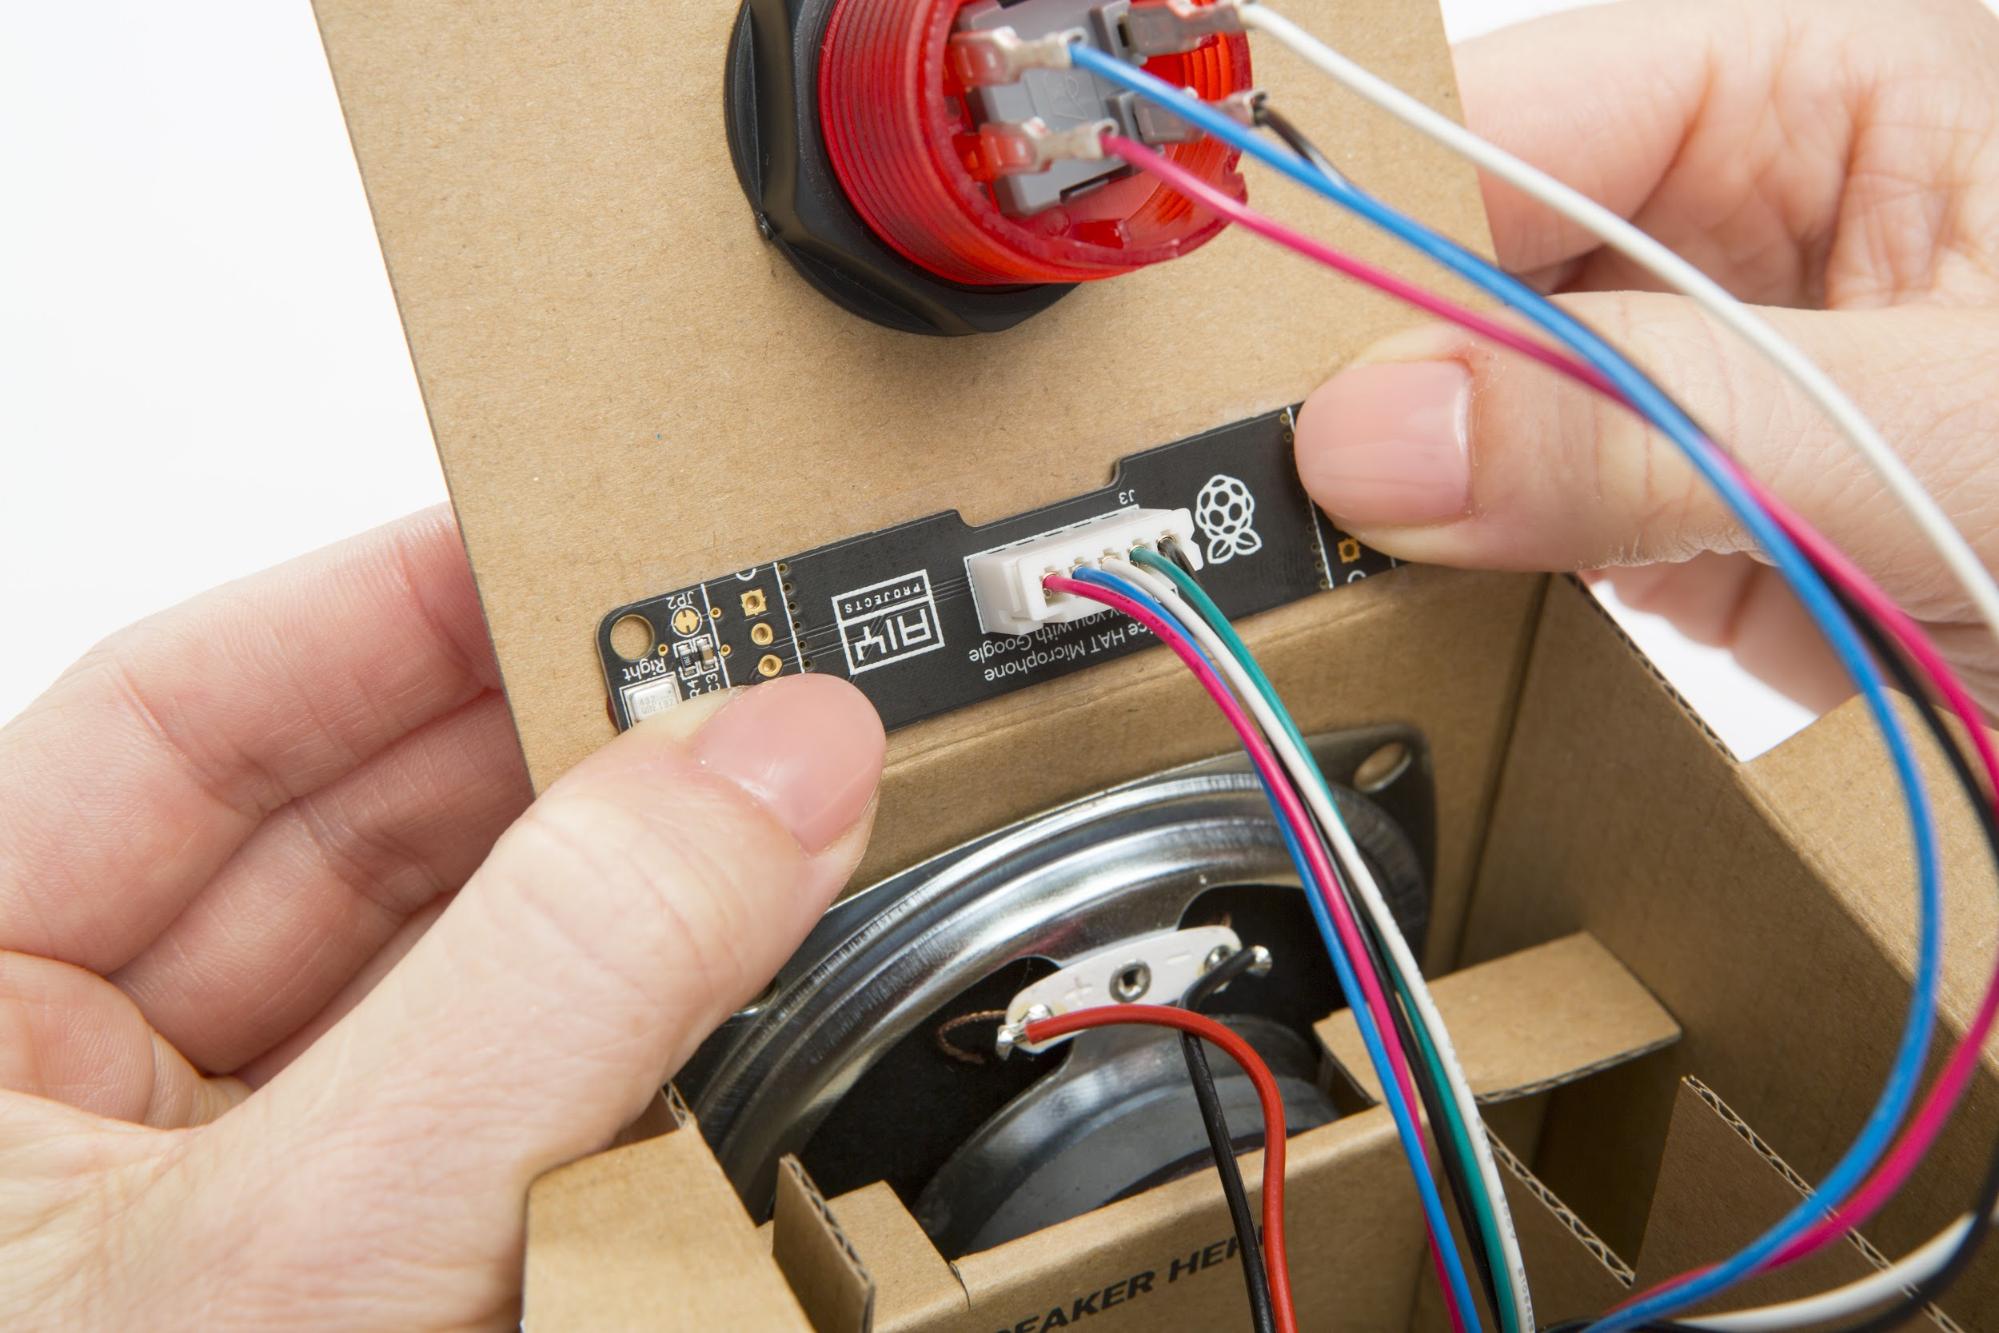
The next step is attaching the microphone board to the cardboard.
We’re using double-sided tape here, but your standard-issue scotch tape works fine too.
Line up the microphone board so the mics (the white boxes on the ends) are sitting aligned with the cardboard holes for maximum listening capability.
Give it a turn and check that your mics are aligned correctly.
Well done! Time to close it up.
Now that your box is assembled, plug your peripherals in:
The SD card can be tricky to remove after it’s been inserted. We recommend using either small, needle nose pliers to remove it, or attaching tape to the SD card before inserting so you can pull on the tape to remove it.
Insert your SD card (the one with the Voice Kit SD image) into the slot on the bottom side of the Raspberry Pi board. The SD card slot should be accessible through a cutout provided in the external cardboard form.
With the SD card in place and peripherals connected, plug in the power supply and the Raspberry Pi will begin booting up.
If you don’t see anything on your monitor, or you see "Openbox Syntax Error", check the troubleshooting guide in the appendix.
Click the network icon in the upper right corner of the Raspberry Pi desktop. Choose your preferred Wi-Fi access point.
Once booted, the red LED on the Raspberry Pi near the power connector should be lit. If not, check the troubleshooting guide.
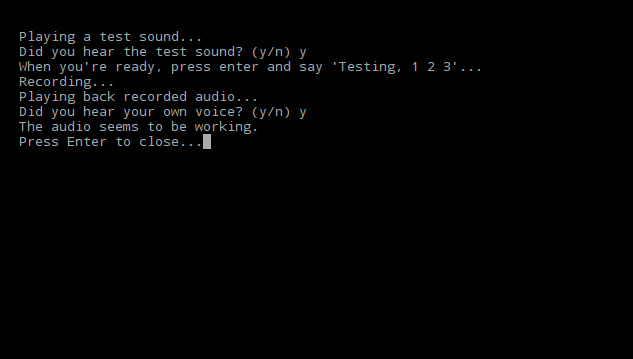
This script verifies the audio input and output components on the Voice HAT accessory board are working correctly. Double-click the Check audio icon on your desktop.
When you click the script, it will run through each step listed below. Note: some of the steps require voice input, which you will be prompted for—so watch closely!
Follow along with the script and if everything is working correctly, you’ll see a message that says
The audio seems to be working
If you see an error message, follow the message details to resolve the issue and try again.
Too loud? Too quiet? Let’s adjust the volume. Type the following command into the terminal and press enter:
alsamixer
This starts the volume control program, as shown in the picture to the left. Use the up and down arrows on your keyboard to adjust the volume. Press the Esc key to exit the program.
To test the new volume level, run Check audio again.
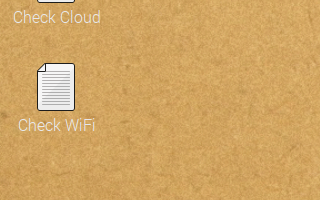
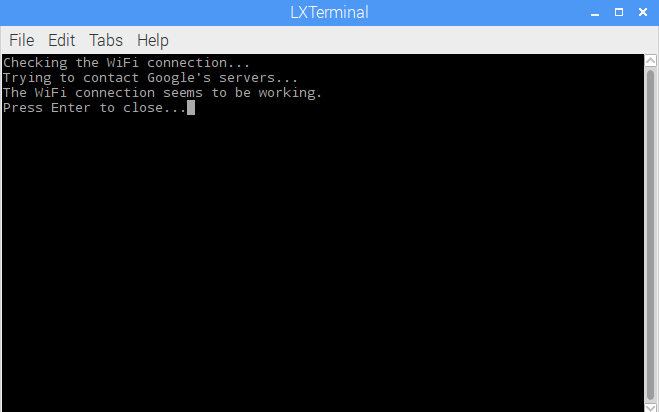
This script verifies that your Wi-Fi is configured and working properly on the Raspberry Pi board. Double-click the Check Wi-Fi icon on your desktop.
When you double-click the script, it will check your Raspberry Pi is connected to the internet over Wi-Fi.
If everything is working correctly, you’ll see a message that says The Wi-Fi connection seems to be working.
If you see an error, click on the network icon at the top right and verify you are connected to a valid access point.
You'll need to know the Raspberry Pi’s IP address so you can SSH to it from your computer in steps below.
You can find it by hovering over the Wi-Fi icon. It will look something like 192.168.0.0 or 10.0.0.0 and prefixed with wlan0Linux uses acronyms like wlan0 as names for network devices connected to your computer. In this case, the wlan part stands for Wireless Local Area Network and the 0 means it's the first device Linux identified. In this case, we want the IP address assigned to the wlan0 device, which is why we looked for it in the tooltip.
Write down the IP address for now.
Congratulations on assembling the voice recognizer device and verifying the components are setup properly. Now you’ll need to connect the device to Google Cloud Platform.
To do that, open the User’s Guide and follow the instructions provided.
Congrats on assembling your voice recognizer device -- now, let’s bring it to life!
The voice recognizer uses the Google Assistant SDK to recognize speech, along with a local Python application that evaluates local commands. You can also use the Google Cloud Speech API. By the end of this guide, your voice recognizer will let you talk to the Google Assistant. Then check out the Maker’s guide for creative extensions to inspire you to use voice capabilities in your future projects.
Make sure your computer is on the same Wi-Fi network as the kit.
Now we’re going to connect to your kit through SSHSSH stands for secure shell. It’s a way to securely connect from one computer to another. and set things up so it can talk to the Google Assistant in the cloud.
We’re going to connect your computer to the Raspberry Pi using SSH in a terminalA terminal is a text window where you can issue commands to your Raspberry Pi. SSH allows you to do so from a separate computer..
If you’re familiar with using a terminal, start an SSH session with pi@192.168.0.0 (but using your Raspberry Pi's real IP address from above), then skip to step 7.
If you're not familiar with a terminal, download and install the Chrome browser and Secure Shell Extension, and proceed to the next step.
Once the extension is installed, open it.
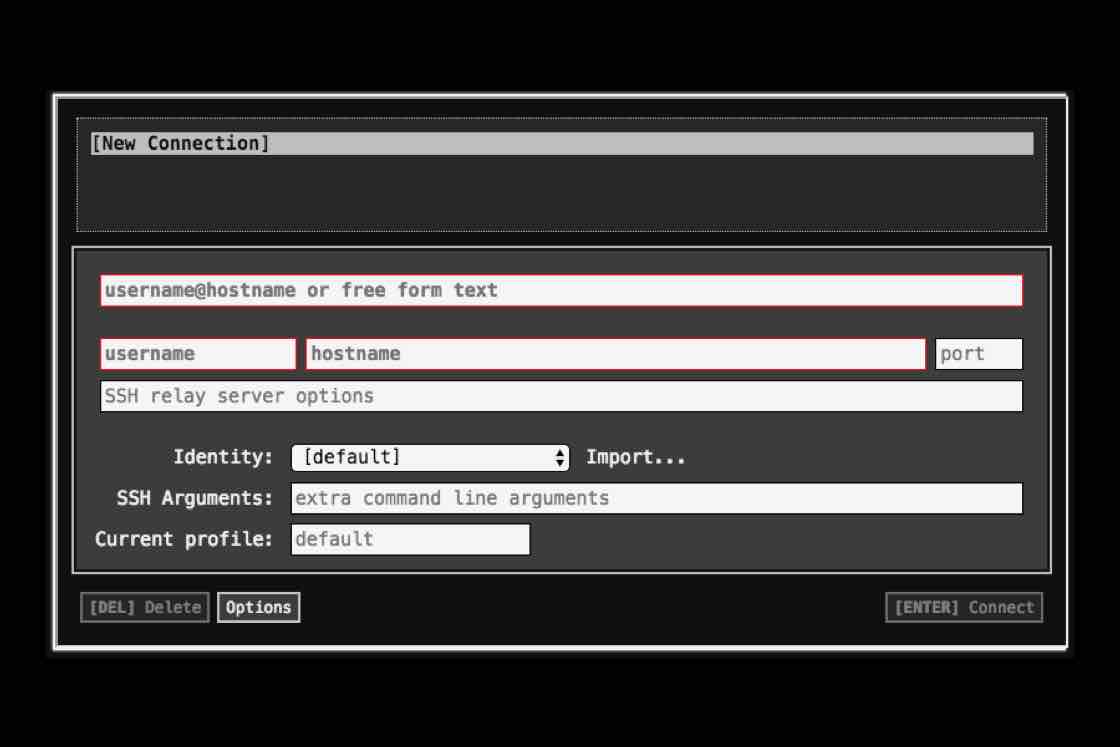
If you’re using Chrome on a Windows, Mac, or Linux computer, you should see the Secure Shell Extension icon ![]() in the toolbar (look to the right of the address bar). Click that icon and then select Connection Dialog in the menu that appears.
in the toolbar (look to the right of the address bar). Click that icon and then select Connection Dialog in the menu that appears.
If you’re using Chrome on a Chromebook, go to the app menu and type "secure shell app extension".
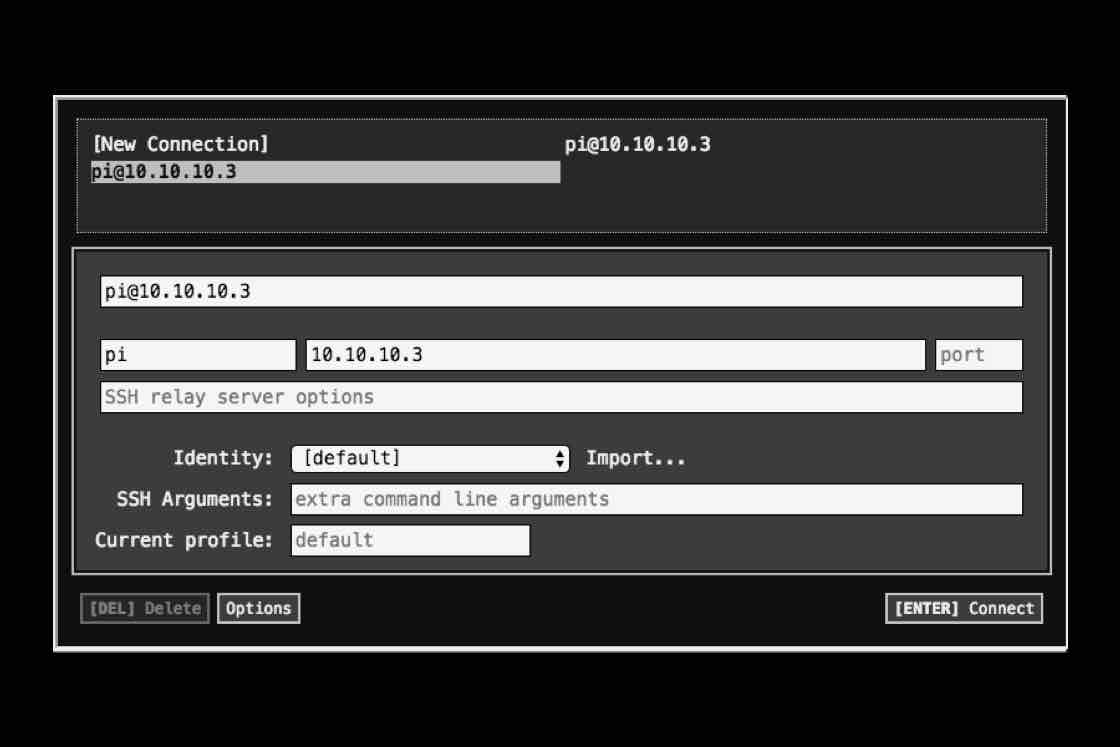
In the top field, type pi@192.168.0.0, but replacing those numbers with the real IP address of your Raspberry Pi. After typing this in, click on the port field. The [ENTER] Connect button should light up.
Click [ENTER] Connect to continue.
Can’t connect? If you can’t connect, check to make sure the IP address you wrote down earlier is correct and that your Raspberry Pi is connected to the same Wi-Fi access point your computer is.
Note If you rewrite or replace your SD card, you will need to remove and add the Secure Shell Extension from Chrome. You can do this by right clicking on the icon in your toolbar and selecting Remove, then re-add it by following the instructions above.
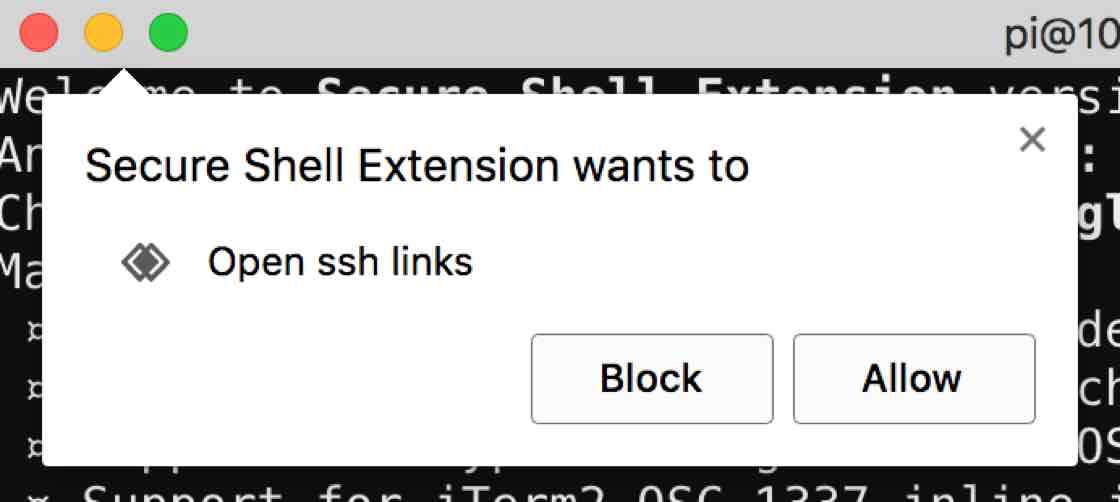
Click Allow.
This gives permission to the SSH extension to access remote computers like your Raspberry Pi.
You will only need to do this when you add the extension into Chrome.
At this point, the SSH extension has connected to your Raspberry Pi and is asking you to verify that the host keyThe SSH extension is designed to be secure, and because of this goal, it needs to identify that the computer you're trying to connect to is actually the computer you expect. To make this job easier, the computers generate a long number and present it to the extension for verification each time. The extension saves this key somewhere safe so that it can verify that the computer you're speaking to is actually the right one. it printed out matches what is stored on the Raspberry Pi. Since this is the first time your Raspberry Pi has been turned on, the data listed above this prompt is brand new, and it's safe to continue.
When you answer yes here, the SSH extension will save this information to your browser and verify it is correct every time you reconnect to your Raspberry Pi.
At the prompt, type yes and press enter to continue.
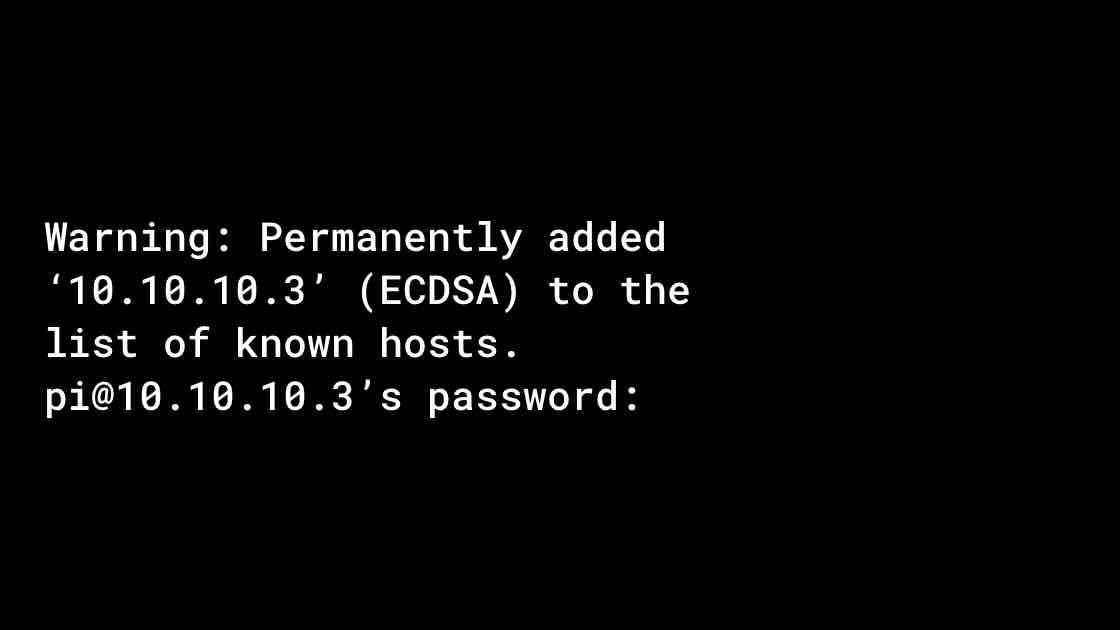
Enter Raspberry Pi’s password at the prompt. The default, case-sensitive password is raspberry
When you type, you won’t see the characters.
If it’s typed wrong, you’ll see “Permission denied, please try again” or “connection closed.” You’ll need to re-start your connection by selecting the (R) option by pressing the R key.
Note Your IP address will be different than the one shown in the example.
It’s okay if you see the warning line. It’s letting you know that the host key has been saved, and the extension will do the hard work of comparing what it just stored with what the Raspberry Pi provides automatically next time.
If the password was entered correctly, you’ll see a message about SSH being enabled by default and the pi@raspberrypi shellA shell is a program that runs on a computer that waits for instructions from you, and helps you to make your computer work for you. promptIt’s a response from the shell that indicates that it is ready to receive commands, and tells you what your current working directory is (the tilde, ~, in this case). It ends in a $ where you type your command. will be green.
Congrats! Your computer is now connected to the Raspberry Pi.
Tip: Copying and pasting in the Secure Shell Extension is a little different than other applications you may be used to. To copy some text, highlight what you want by clicking and dragging with the left mouse button, and as soon as you let go of it, it'll copy it. To paste, click the right mouse button. On a touchpad this can be a little tricky, so try tapping or pressing in the lower right of the touchpad, or tapping with two fingers.
In order to make use of the Google Assistant APIsAn API (Application Programming Interface) is a collection of functions that programs can call to make use of extra functionality. It's kinda like using an ice cream maker; you put things in and get a delicious result back! , you need to get credentials from Google's developer console.
On your computer (not the Raspberry Pi), go to https://console.cloud.google.com/ and log in with your Google account.
If it's your first time, you'll need to agree to the terms of service.
Don’t have a Google account? Sign up for one here.
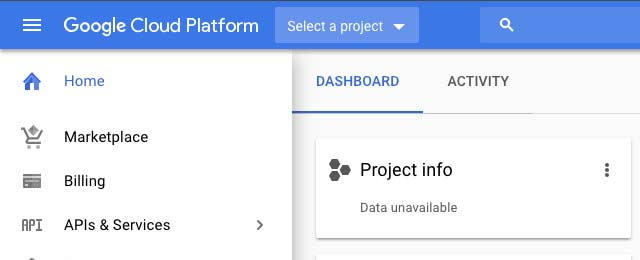
First, we have to create a project to track all of the APIs we want to use on the Voice Kit.
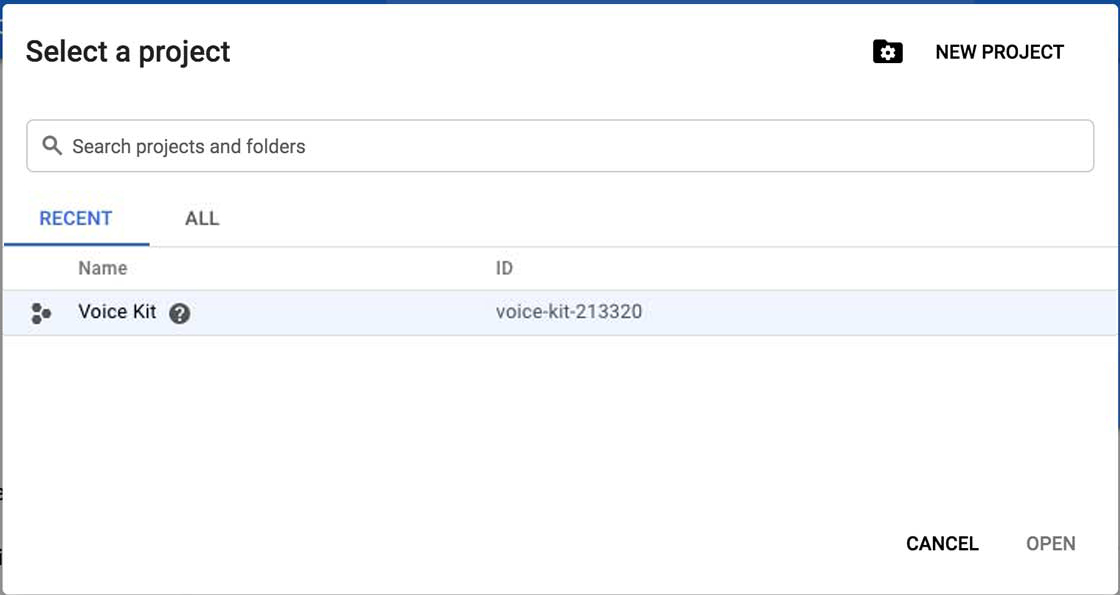
From the top bar, click Select a project.
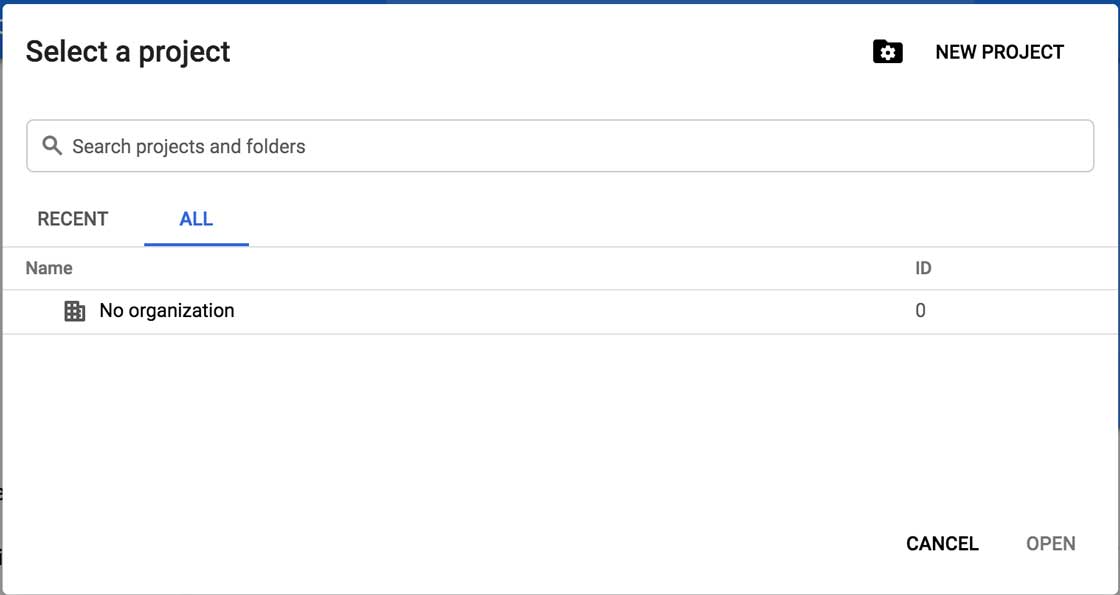
A dialog like the image to the left will appear.
Click New Project in the top right corner of the dialog.
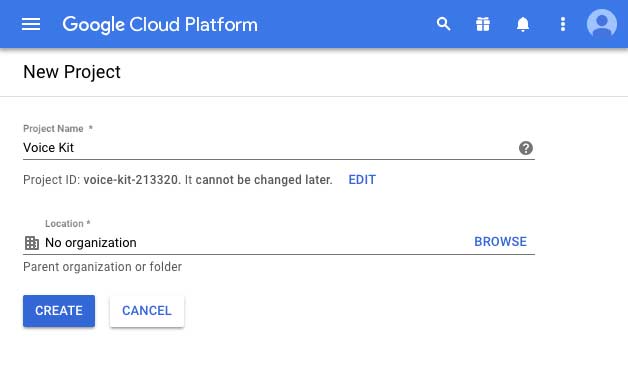
Enter a project name and click Create. (You can leave the Location option alone.)
We’ve used "Voice Kit" for a project name, but you can enter any name you like.
Now that we've created the project, we need to select it so we can turn on the APIs we want to use.
Click the Home link in the left navigation. Then click Select a project at the top of the screen again. Then select the project you just created.
This opens the dashboard view for your project (you can tell by the dropdown at the top of the screen; it should display the name you chose in the previous step).
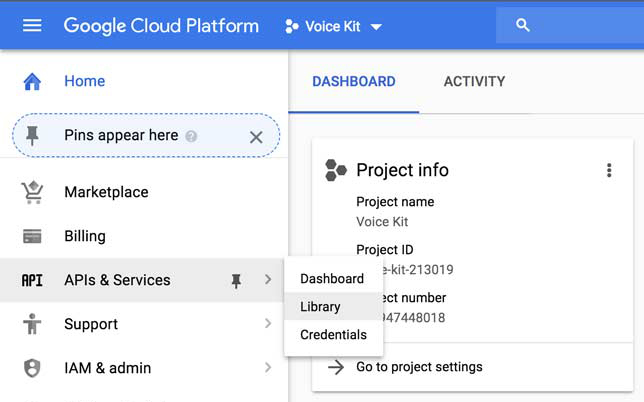
If the left navigation is not already visible, click on the three-line menu icon at the top left of the page to open it. Hover your mouse over APIs & Services, and then click Library.
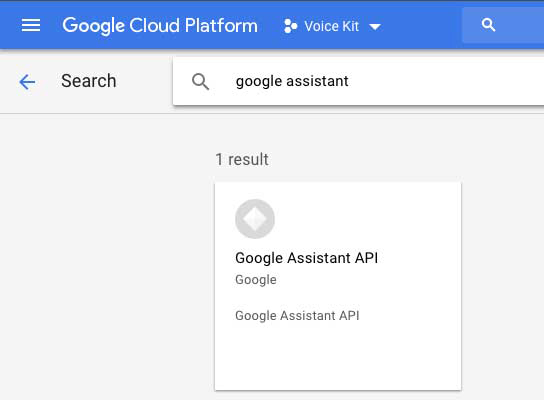
In the search box, type "google assistant" and click on the card labeled Google Assistant API.
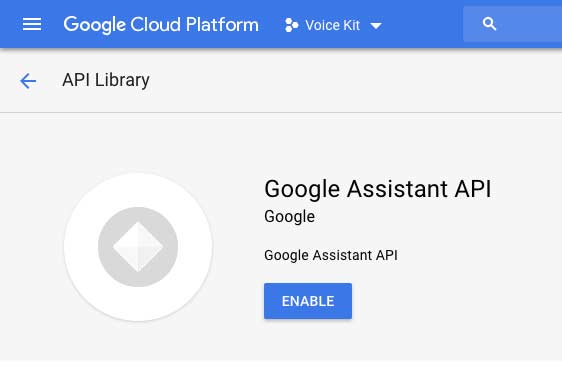
Click Enable.
This turns on the Google Assistant API for your project, and gives applications you write access to its features.
You'll be directed to a Dashboard page for the Google Assistant API. From here you can get more details on how you're using the API and see how many requests you're making.
Right now, we just need to create a credentials file so the Voice Kit demos can tell Google who they are, and which project they're a part of.
Click the Create credentials button.
Tip: If you later need to restart this process, the UI will be a little different: Make sure you're viewing the API & Services > Credentials section in the left nav, and at the top of the screen, click Create credentials > Help me choose. That will open the following credentials helper.
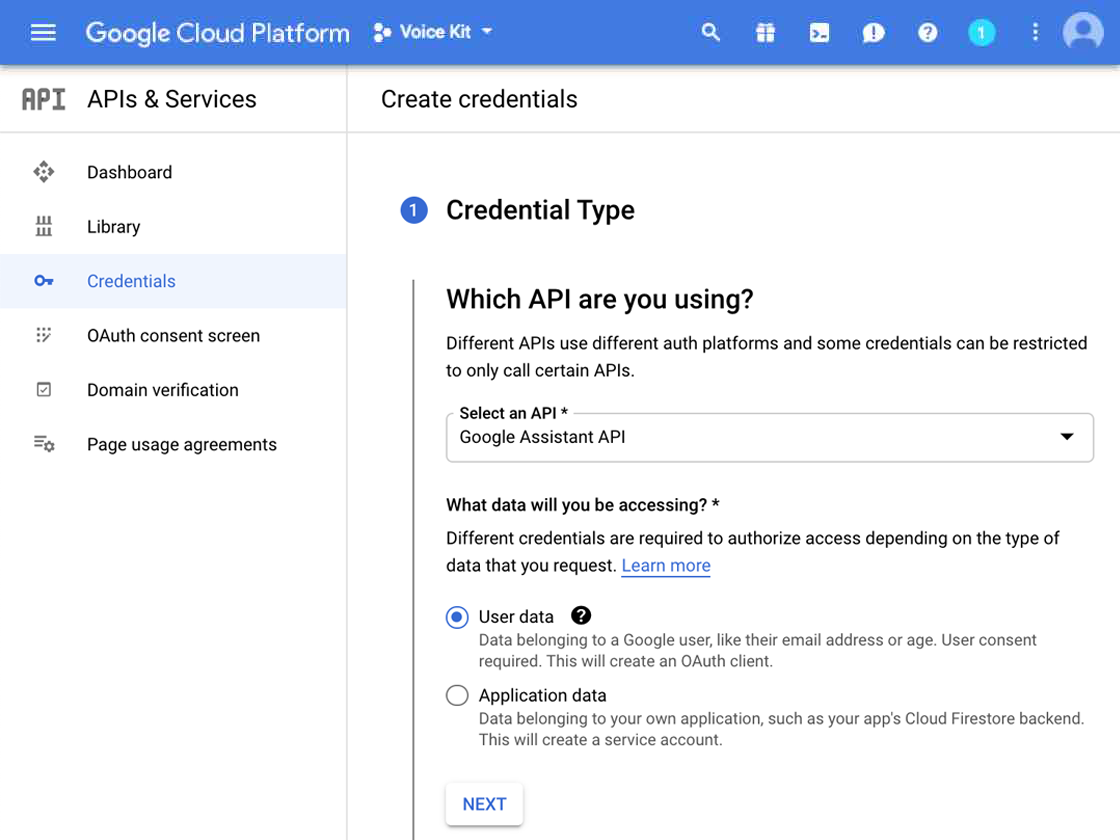
You should be directed to the Credentials helper page.
For "Which API are you using?", select Google Assistant API.
For "What data will you be accessing?", select User data.
Then click Next.
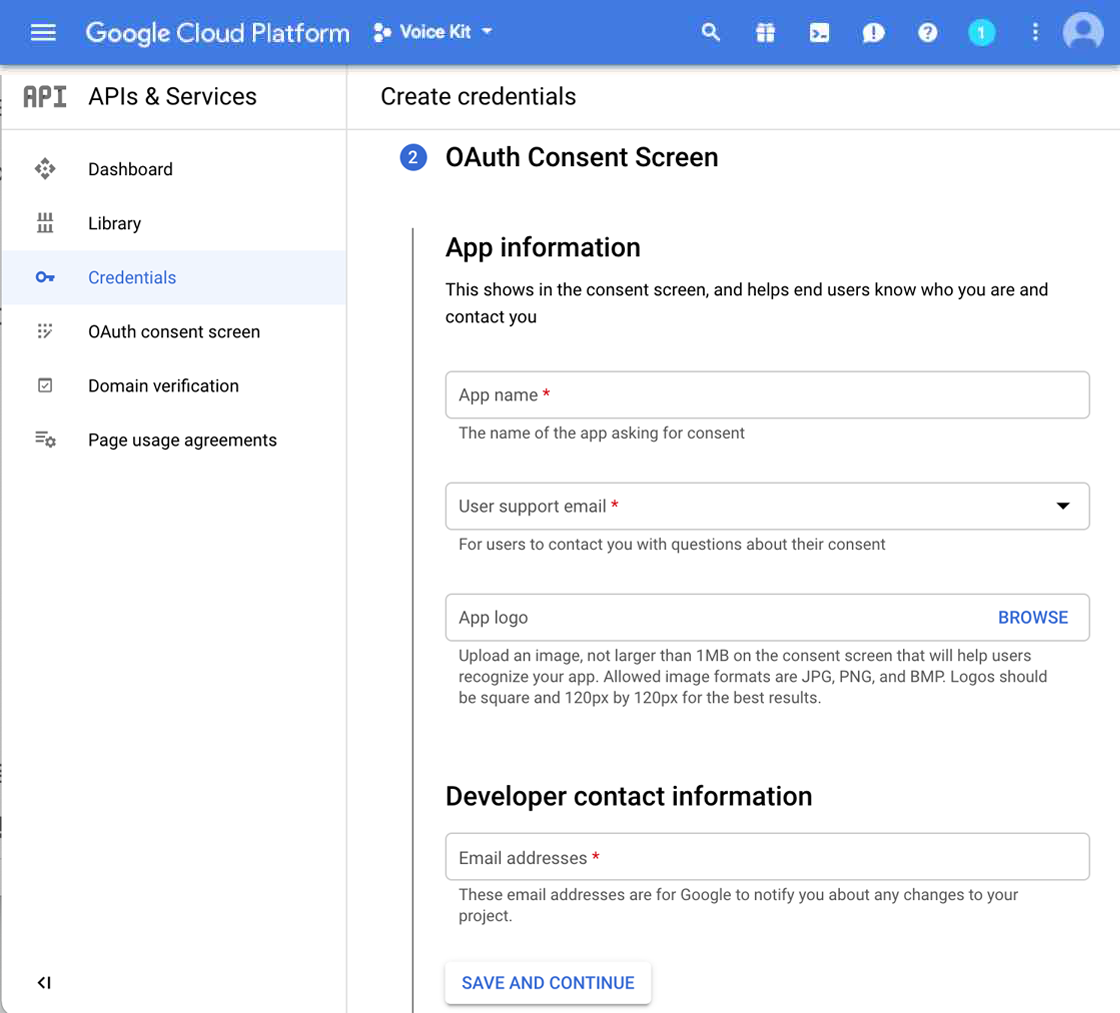
Because the app requires user data, you need to add information for a user consent screen.
The information in the consent screen is intended for end-users when publishing a production product that uses Google APIs. But because this project is just for your personal use, you can keep it simple.
Enter something for the App name, such as "Voice Kit Project."
For the User support email, select your account email from the drop-down.
You can leave the App logo empty, and type your email for the Developer contact information.
Then click Save and continue.
Skip the Scopes section by scrolling down and clicking Save and continue.
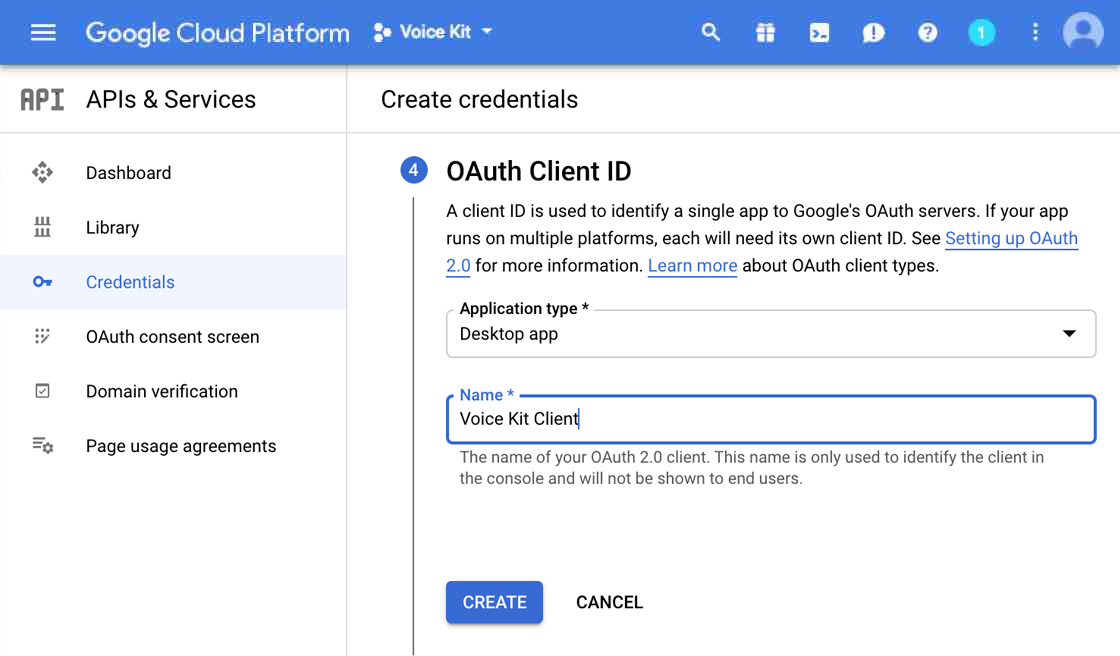
Next, you'll see the OAuth Client ID section. For the Application type, select Desktop app, and enter a name for the client, such as "Voice Kit Client."
Then click Create.
Finally, you have the Google Assistant client credentials! You'll need to add these credentials to the Vision Kit. But before you do that, we need to do one more thing in the Cloud Console...
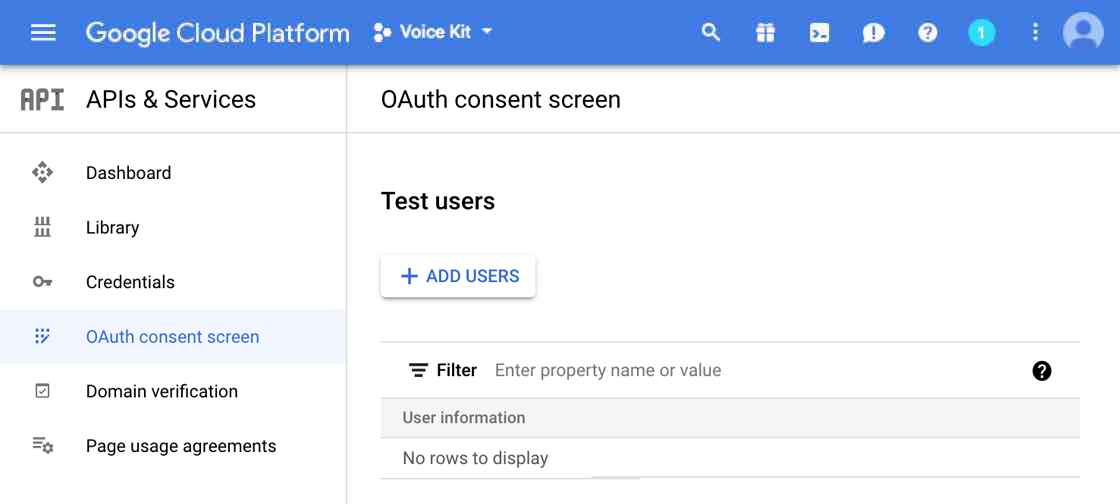
In the left navigation, click OAuth consent screen.
Scroll down to Test users and click Add users.
In the form that appears, enter your Google Account email address (it must be the account that you'll use when signing in from the Voice Kit), and click Save.
You should then see your email address listed under Test users (below the button).
Now go get the client credentials by clicking Credentials in the left nav.
Find your client name under OAuth 2.0 Client IDs and click
the download button  on the far right. A dialog appears where you must then click Download JSON to get the credentials in a .json fileA .json file is a plain text file that contains JavaScript-formatted data. In this case, this data contains information that the demo scripts will present to Google's servers to identify them, but they can contain any kind of data..
In the following steps, you'll copy this to your Raspberry Pi and save it at ~/assistant.json.
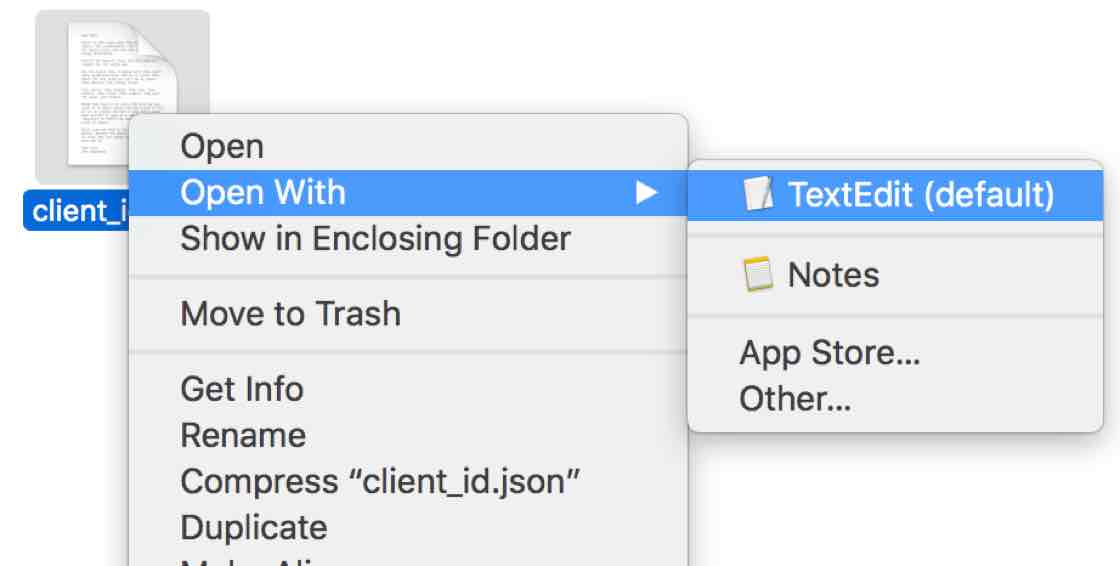
Open your Downloads folder and find the .json file (it has a very long name starting
with client_secret_).
For Mac: Right-click the file and select Open With > TextEdit.
For Windows: Right-click the file and select Open With > More applications > Notepad.
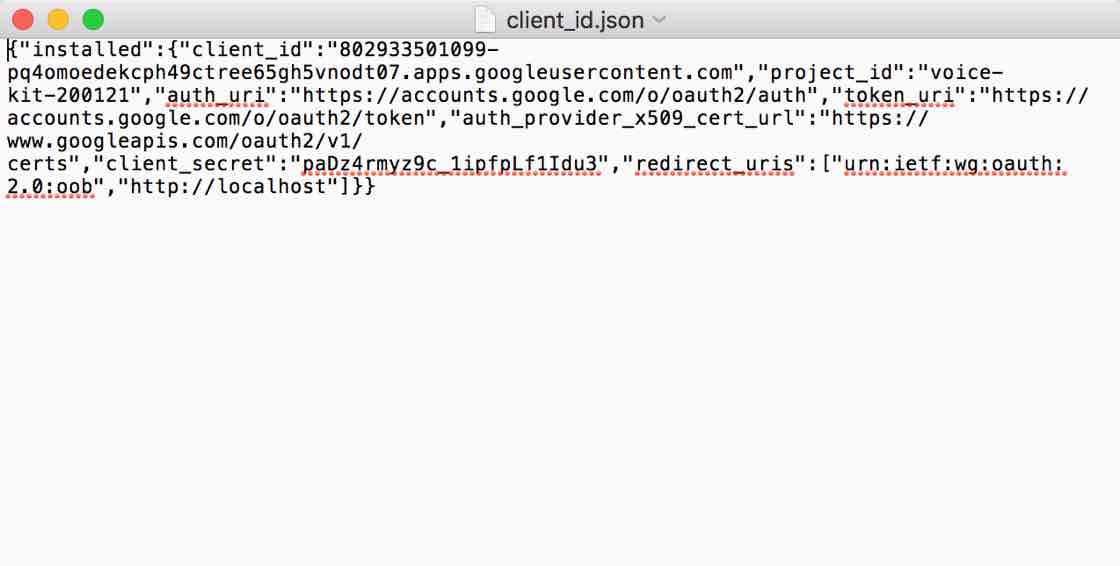
We’re going to copy the text from the text file so that we can paste it into a new file on your Raspberry Pi.
From Notepad or TextEdit, select Edit > Select All, then Edit > Copy.
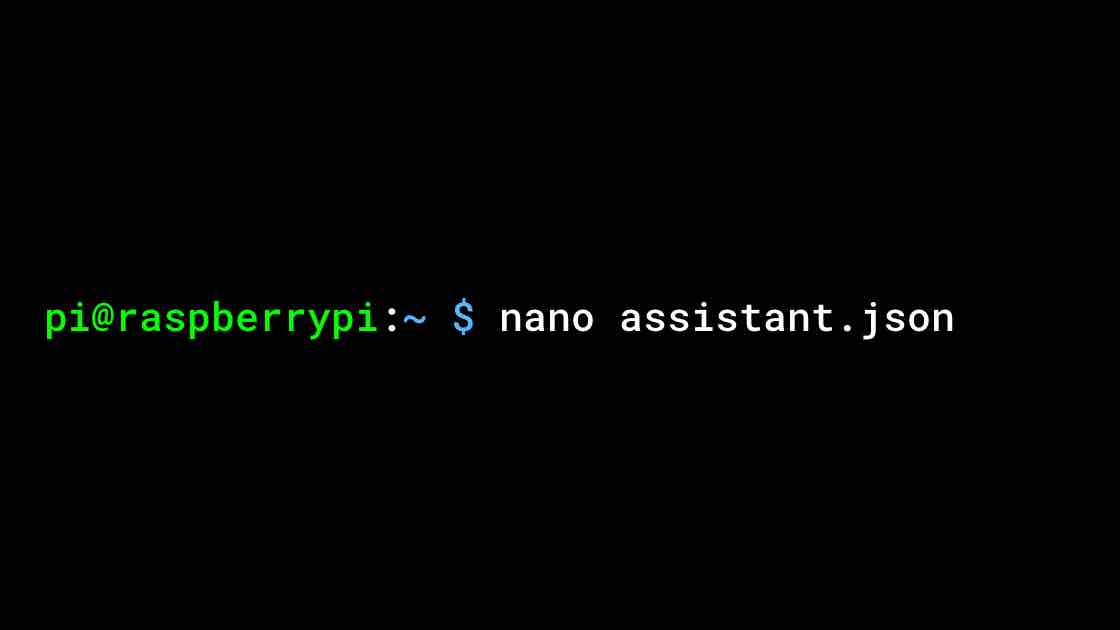
Back in Secure Shell Extension, type the following command and press enter:
nano assistant.json
This command starts the nano text editor so we can paste the contents of the JSON file we downloaded earlier into a file on disk.
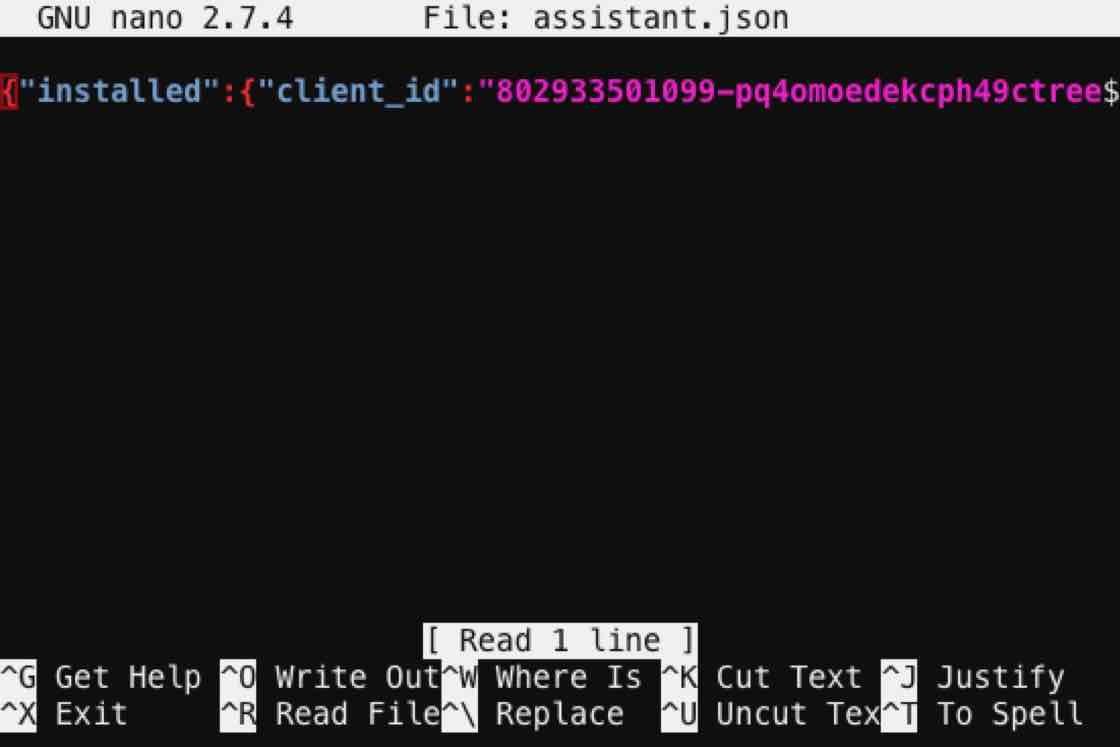
Right-click to paste the text.
Note: Your client id will look different.
To save the file, press Ctrl-O (that’s O as in Open, not the number zero).
A prompt appears to verify the file name you already specified: assistant.json. Press Enter.
Hint: nano has quite a few options you can use to write programs with later. Press Ctrl-G to find out more.
Press Ctrl-X to exit. This will bring you back to the shell prompt.
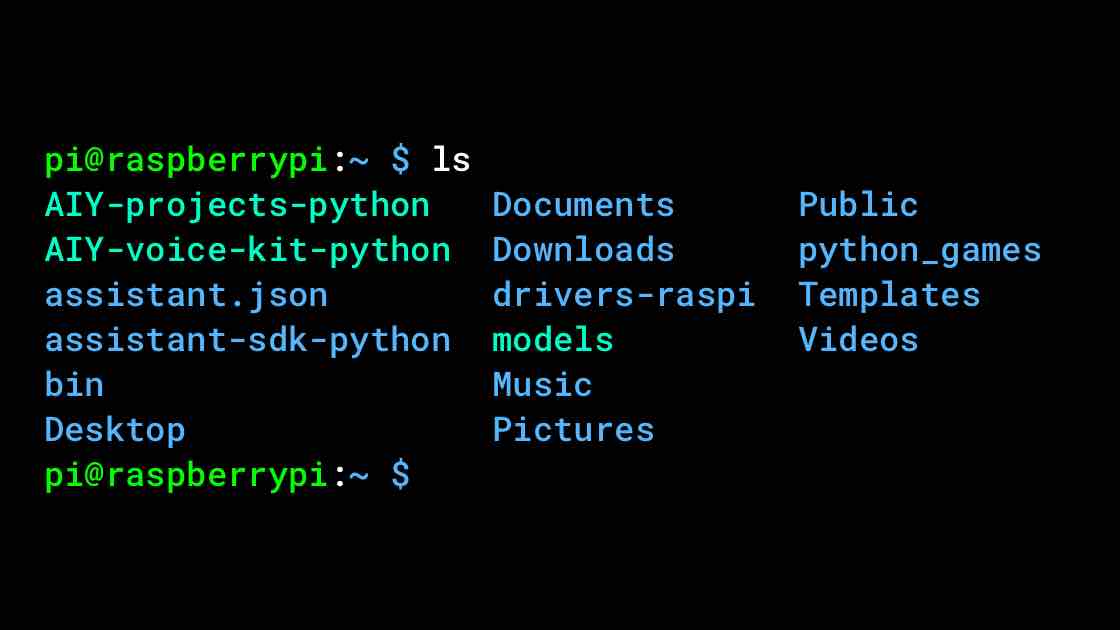
Type lsls is shorthand for LiSt and prints out all of the files in the current working directory. It's a great way to look around and see what changed on disk. and press enter (that’s an “l” as in lemon, not a #1).
This shows you all of the files in your current directory. You should see assistant.json here.
To see the file contents, run cat assistant.json.
Congrats! Now you have the API credentials you need for the Voice Kit demos (the demos know to
look here for the assistant.json file).
We've provided several demo apps that showcase voice recognition and Google Assistant with different capabilities, which you can use as templates to create your own apps. They're located in ~/AIY-projects-python/src/examples/voice/.
In this section, we'll describe a few of these demos that we recommend you try.
For the device to begin acting as your Google Assistant much like Google Home, start the assistant library demo app by double-clicking "Start dev terminal" on the Desktop and entering:
cd ~/AIY-projects-python/src/examples/voice

./assistant_library_demo.py
You’ll see a message about going to a URL to authorize your application. Because this application makes use of the Google Assistant, it needs your permission to safely access your Google account's data. To do this, you have to authorize it by going to the URL it printed out and grant access. The web browser should open automatically and load this page. If not, then copy and paste the link you see in the terminal into your browser, and then login and grant access.
The assistant library app has hotword detection built-in. To start a conversation with the Google Assistant, say "Okay, Google" or "Hey Google". When you are done, press Ctrl-C to end the application.
Double-click "Start dev terminal" on the Desktop and enter:
cd ~/AIY-projects-python/src/examples/voice

./assistant_grpc_demo.py
Unlike the assistant library demo, this demo does not support hotword detection. To ask Google Assistant a question, press the arcade button and speak. When you are done, either press the arcade button and say "goodbye", or simply press Ctrl-C to end the application.
The cloud speech demo named cloudspeech_demo.py makes use of the Google Cloud Speech APIs. If you do not need the conversations provided by Google Assistant, this is useful for building your own app to recognize voice commands.
Details for this demo are provided in the section below about building a custom voice user interface.
Congrats! You’ve set up your very own intelligent speaker.
Now that you’ve got a taste for the Voice Kit can do, we’d love to see what you do with it. In the following Makers Guide section, you'll find documentation about the Python APIs, hardware, and tools that help you to build your own intelligent speaker projects.
Share your creations with the maker community at #aiyprojects
Heads up! The next part assumes a much higher level of technical experience. So if you're new to programming, don't be discouraged if this is where you stop for now.
This is a hackable project, so we encourage you to make this project your own! We’ve included a whole section on replacing the Google Assistant SDK with the Cloud Speech API to give you even more options. This guide gives you some creative extensions, settings, and even a different voice API to use.
We hope this project has sparked some new ideas for you.
To support various features in the Voice Kit, we've built a Python library that handles a lot of programming dirty work for you. It makes it easy to interact with services like Google Assistant and Cloud Speech-to-Text, and to use kit peripherals such as the button and LEDs.
These APIs are built into a Python package named aiy, which is pre-installed in the kit's system image. Just be sure that you've installed the latest system image.
To learn more about these APIs, refer to the API reference. In particular, the following APIs will be of interest for use with your Voice Kit:
aiy.assistant:
APIs that simplify interaction with the Google Assistant API.aiy.cloudspeech:
APIs that simplify interaction with the Google Cloud Speech-to-Text service.aiy.voice.audio:
APIs to record and play audio files.aiy.voice.tts:
An API that performs text-to-speech (reads some text aloud).aiy.board:
APIs to use the button attached to the kit, and the button's LED.You might find it easier learn the aiy Python API if you start with an existing demo and modify it to do what you want.
These files are already installed on your kit at ~/AIY-projects-python/src/examples/. You can also browse the examples on GitHub, where you'll find the source code for all the examples and more.
For instance, to learn more about the aiy.voice.audio API, try running the voice_recorder.py example:
cd ~/AIY-projects-python/src/examples/voice

./voice_recorder.py
This waits for you to push the button, then begins recording what you say. When done speaking, press the button again and it will play the recording.
To see how it works, open this file on your Raspberry Pi or see the source code here. Then start tweaking the code.
If you're more interested in programming hardware such as buttons and servos, see the section below about the GPIO expansion pins, which includes some other example code.
An activation trigger is a general term describing the condition on which we activate voice recognition or start a conversation with the Google Assistant. Previously you have seen two different types of activation triggers:
Voice activation trigger
This is the "Okay, Google" hotword detection in the assistant library demo. The assistant library continuously monitors the microphones on your VoiceHat. As soon as it detects that you said "Okay, Google", a conversation is started.
Button trigger
This is when you press the arcade button. Internally, it is connected to the GPIO on the Raspberry Pi (take a look at the driver code: aiy._drivers._button).
You may design and implement your own triggers. For example, you may have a motion detection sensor driver that can call a function when motion is detected:
# =========================================
# Makers! Implement your own actions here.
# =========================================

import aiy.audio
import aiy.cloudspeech
import aiy.voice


def main():
    '''Start voice recognition when motion is detected.'''
    my_motion_detector = MotionDetector()
    recognizer = aiy.cloudspeech.get_recognizer()
    aiy.audio.get_recorder().start()
    while True:
        my_motion_detector.WaitForMotion()
        text = recognizer.recognize()
        aiy.audio.say('You said ', text)


if __name__ == '__main__':
    main()
Want to try another API? Follow the instructions below to try the Google Cloud Speech-to-Text service, which converts spoken commands into text you can use to trigger actions in your code. This API supports 80 languages, long audio clips, and the ability to add hint phrases that help improve the accuracy of speech recognition.
To get started, you'll use the src/examples/voice/cloudspeech_demo.py example code.
The Google Cloud Speech-to-Text service is a cloud-based service. If you use it for less than 60 minutes a month, it’s free. Beyond that, the cost is $0.006 for every 15 seconds. Don’t worry: you’ll get a reminder if you go over your free limit.
cloud_speech.jsoncredentials.json file to the correct folder by entering the following:(using the local file system) `cp /path/to/downloaded/credentials.json ~/cloud_speech.json`
(from another machine)
`scp /path/to/downloaded/credentials.json pi@raspberrypi.local:~/cloud_speech.json`
On your desktop, double-click the Check Cloud icon. Wait a few moments while the script runs. If everything is working correctly, you’ll see this message:
Eveything is set up to use the Google Cloud
If you see an error message, follow the details and try the Check Cloud script again.
On your desktop, double-click the Start Dev Terminal icon. Then start the app by running the following commands:
cd ~/AIY-projects-python/src/examples/voice

./cloudspeech_demo.py
Once the program starts, it prints some log messages, including INFO:aiy.cloudspeech:Start listening which means it's ready to receive a voice command. So now you can speak one of the following commands (speak loudly and clearly toward the Voice Kit).
| Voice command | Response |
|---|---|
| turn on the light | The button LED turns on |
| turn off the light | The button LED turns off |
| blink the light | The button LED blinks |
| goodbye | The app exits |
Now you can add your own voice actions by modifying cloudspeech_demo.py as follows.
Let's add the ability for the program to repeat what you say. That is, if you say something like, "repeat after me, hello world," then it will say "hello world."
To improve the recognition accuracy for your voice command, first make it explicit what command you expect to hear by adding it to the list returned by the get_hints() function:
def get_hints(language_code):
    if language_code.startswith('en_'):
        return ('turn on the light',
                'turn off the light',
                'blink the light',
                'goodbye',
                'repeat after me')
    return None
Then add the code to handle the command. We will use aiy.voice.say to repeat the recognized transcript. So add a new condition in the if-else code at the bottom of the main() function as shown here:
            if 'turn on the light' in text:
                board.led.state = Led.ON
            elif 'turn off the light' in text:
                board.led.state = Led.OFF
            elif 'blink the light' in text:
                board.led.state = Led.BLINK
            # Our new command:
            if 'repeat after me' in text:
                # Remove "repeat after me" from the text to be repeated
                to_repeat = text.replace('repeat after me', '', 1)
                aiy.voice.tts.say(to_repeat)
            elif 'goodbye' in text:
                break
But the code doesn't know about this say() function yet. So you need to go back to the top of the file and add the following import statement alongside the others:
import aiy.voice.tts
Now save the file.
The complete modified cloudspeech_demo.py should look like this:
"""A demo of the Google CloudSpeech recognizer."""
import argparse
import locale
import logging

from aiy.board import Board, Led
from aiy.cloudspeech import CloudSpeechClient
import aiy.voice.tts


def get_hints(language_code):
    if language_code.startswith('en_'):
        return ('turn on the light',
                'turn off the light',
                'blink the light',
                'goodbye',
                'repeat after me')
    return None

def locale_language():
    language, _ = locale.getdefaultlocale()
    return language

def main():
    logging.basicConfig(level=logging.DEBUG)

    parser = argparse.ArgumentParser(description='Assistant service example.')
    parser.add_argument('--language', default=locale_language())
    args = parser.parse_args()

    logging.info('Initializing for language %s...', args.language)
    hints = get_hints(args.language)
    client = CloudSpeechClient()
    with Board() as board:
        while True:
            if hints:
                logging.info('Say something, e.g. %s.' % ', '.join(hints))
            else:
                logging.info('Say something.')
            text = client.recognize(language_code=args.language,
                                    hint_phrases=hints)
            if text is None:
                logging.info('You said nothing.')
                continue

            logging.info('You said: "%s"' % text)
            text = text.lower()
            if 'turn on the light' in text:
                board.led.state = Led.ON
            elif 'turn off the light' in text:
                board.led.state = Led.OFF
            elif 'blink the light' in text:
                board.led.state = Led.BLINK
            # Our new command:
            if 'repeat after me' in text:
                # Remove "repeat after me" from the text to be repeated
                to_repeat = text.replace('repeat after me', '', 1)
                aiy.voice.tts.say(to_repeat)
            elif 'goodbye' in text:
                break

if __name__ == '__main__':
    main()
Return to your terminal window and run the code again. Wait until the terminal prints INFO:aiy.cloudspeech:Start listening and then try saying "repeat after me, hello world." The result should be that the speaker says "hello world."
If you plan to take your project beyond the cardboard box, you might be wondering which GPIO pins are available for your other hardware. So figure 1 shows which pins from the Raspberry Pi are used by the Voice HAT.
The pins highlighted in dark green are used by the HAT and not available to you, while the pins in light green are available with special GPIO pins on the Voice HAT (see the following section).

Figure 1. GPIO pins used by the Voice HAT
Several GPIO pins from the Raspberry Pi are accessible on the Voice HAT as shown in figure 2.
On the left side are sets of three pins that can control servos:
Note: The drive limit for servos is 25 mA.
On the right side are sets of three pins that can function as high-current drivers (they are open drain drivers and can handle inductive loads with a 1 amp max current):
So when the middle and right pin are connected to a load, they create an open drain output controlled by the GPIO pin. For example, if you want to control a DC motor, connect your motor's negative terminal to the pin on the right (such as Driver0) and connect the positive terminal to the corresponding 5V pin in the middle (leave the left pin alone). Then you can turn on the motor by enabling the GPIO pin (enable GPIO04 to control Driver0).
Note: The drivers include a PTC fuse with a trip current of 1 amp and a hold current of 0.5 amp. That means it will trip for any current greater than 1 amp, and will not trip for any current less than 0.5 amp. If it trips, it needs about a minute to reset at room temperature, then the driver can be used again.
All GPIO pins originate from the Raspberry Pi's 40-pin header, as shown in figure 1, so your ability to control analog outputs with PWM is limited by the Raspberry Pi's capabilities.
Tip: If your project requires an analog-to-digital converter (ADC), notice that the row of I2C pins at the top-left side of the Voice HAT align nicely with boards such as the ADS1015 12-Bit ADC and the ADS1115 16-Bit ADC.
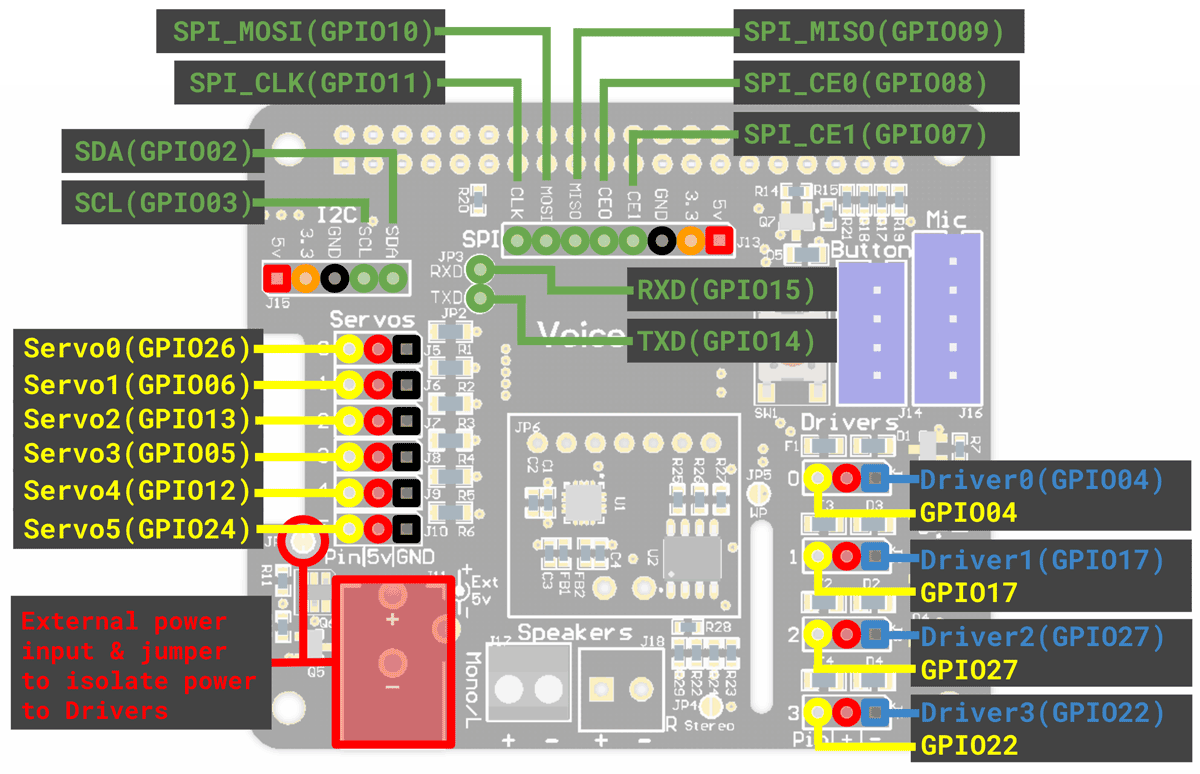
Figure 2. GPIO, servo, and driver pins on the Voice HAT
When using the driver and servo pins, beware that the 5V pin is driven by the Raspberry Pi's 5V pin on the GPIO header (by default), and the Raspberry Pi requires a near-constant 5V differential. So if you're running multiple servos or even one high-current driver, you might cause a voltage drop that will brownout the system and reset the Raspberry Pi.
So when using high-current drivers or multiple servos, consider attaching a second DC power supply to the power pins on the bottom-left side of the Voice HAT (see figure 2). This will help avoid major voltage drops. By default, these power pins connect to the same 5V rail provided by the Raspberry Pi, so the power you give must not exceed 5V.
However, if you want to drive any loads that demand more than 5V, you can cut the nearby power jumper (use a utility knife to separate the left and right side of JP1), which will separate the external power supply from the Raspberry Pi's 5V power rail. Then your external power supply will connect to the positive terminals on the driver pins only (the rest remain powered by the Raspberry Pi), and you can provide a higher voltage to the drivers only.
The rest of the pins at the top of the board are exactly as provided from the Raspberry Pi.
If you'd like to add a right channel speaker for stereo sound, we recommend you add the Adafruit I2S Amplifier (MAX98357A) board to the Voice HAT. Using the pins included with that board, it sits perfectly onto the set of pins at JP6 on the Voice HAT, as indicated in figure 3.
When connecting the Adafruit board, also connect the amp board's speaker pins to corresponding pins on the Voice HAT, which carry the signal to the footprint for the right channel terminals on the Voice HAT.
Then to enable the right channel, add a small piece of solder on the jumper at JP4.
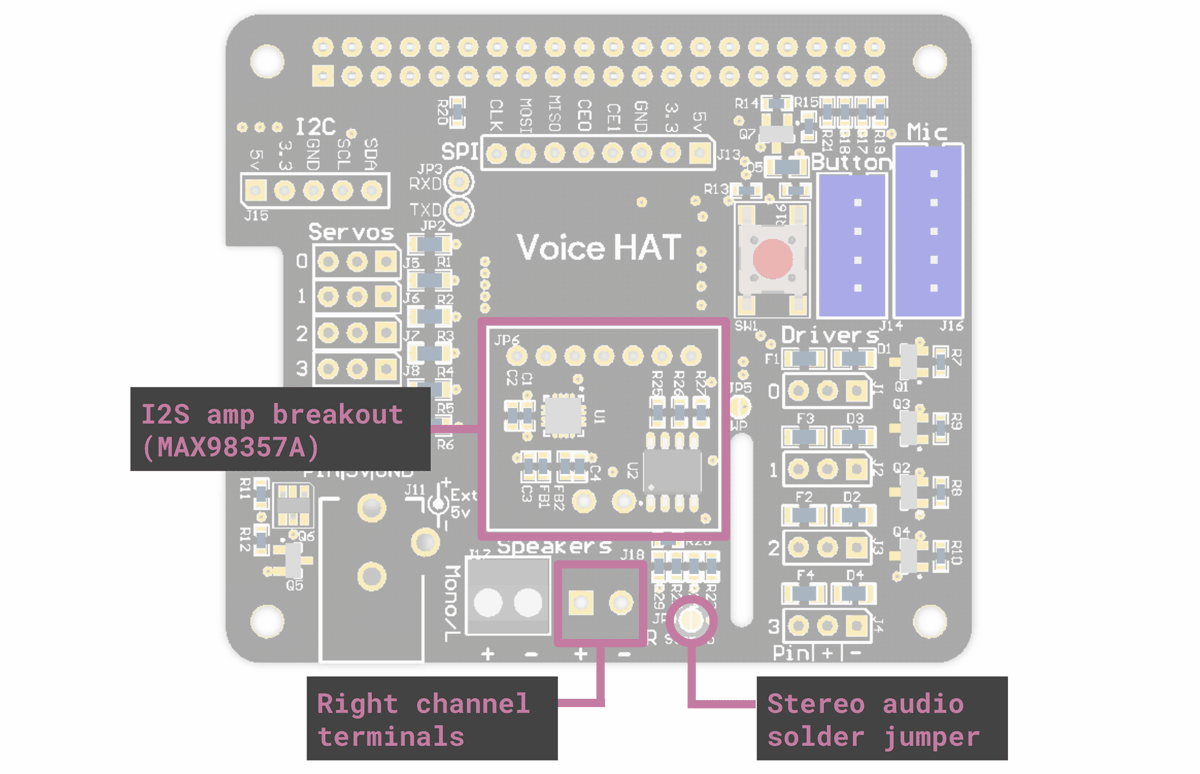
Figure 3. Stereo terminals and amp expansion on the Voice HAT
Want to learn how to use your Voice Kit to control other IoT devices? You can start here with a Particle Photon (a Wi-Fi development kit for IoT projects) and Dialogflow (a tool for creating conversational interfaces). This tutorial will show how to make your Voice Kit communicate with Dialogflow (and Actions on Google) to control an LED light with the Photon by voice.
Get all the code for this example here.
This example ties together multiple technology platforms, so there are a few separate components included in this repo:
dialogflow-agent - an agent for Dialogflowdialogflow-webhook - a web app to parse and react to the Dialogflow agent's webhookparticle-photon - a Photon app to handle web requests, and to turn the light on and offWe've included two separate web app implementations. Choose (and build on) the one that best suits your preferences:
1-firebase-functions - a microservices-oriented implementation, built for deployment to Cloud Functions for Firebase — a serverless, on-demand platform2-app-engine - a server-based implementation, designed to run on Google App Engine (or your server of choice)This should be enough to get you started and on to building great things!
We’ll build our web app with Node.js, and will rely on some libraries to make life easier:
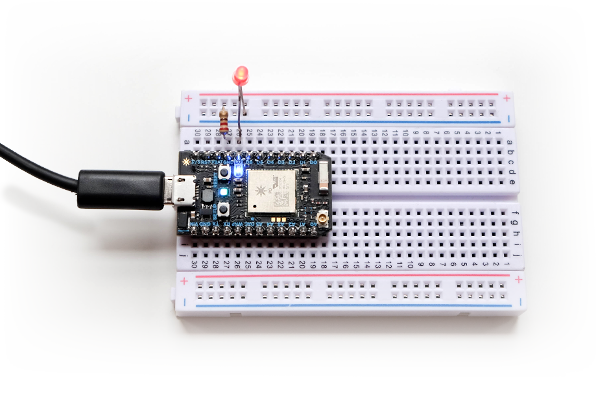
On the hardware side, you will need:
It's handy to have a breadboard, some hookup wire, and a bright LED, and the examples will show those in action. However, the Photon has an addressable LED built in, so you can use just the Photon itself to test all the code presented here if you prefer.
You'll also need accounts with:
If you're just starting out, or if you're already comfortable with a microservices approach, you can use the 1-firebase-functions example — it's easy to configure and requires no other infrastructure setup. If you'd prefer to run it on a full server environment, or if you plan to build out a larger application from this, use the 2-app-engine example (which can also run on any other server of your choosing).
If you've got all those (or similar services/devices) good to go, then we're ready to start!
Assuming you have all the required devices and accounts as noted above, the first thing you'll want to do is to set up apps on the corresponding services so you can get your devices talking to each other.
First, you'll need to clone this repo, and cd into the newly-created directory.
git clone git@github.com:google/voice-iot-maker-demo.git
cd git@github.com:google/voice-iot-maker-demo.git
You should see three directories (alongside some additional files):
dialogflow-agent - the contents of the action to deploy on Dialogflowdialogflow-webhook - a web application to parse the Google Actions/Dialogflow webhook (with server-based and cloud function options)particle-photon - sample code to flash onto the Particle PhotonOnce you‘ve taken a look, we’ll move on!
Using the Dialogflow account referenced above, you‘ll want to create a Dialogflow agent. We'll be setting up a webhook to handle our triggers and send web requests to the Particle API.
./dialogflow-agent/voice-iot-maker-demo.zip)You've now imported the basic app shell — take a look at the new ledControl intent (viewable from the Intents tab). You can have a look there now if you're curious, or continue on to fill out the app's details.
You can now test out the conversational side of the app in one of two ways:
You can also try talking to your application on any Assistant-enabled device that you‘re signed into.
However, if you’re following along step-by-step, it won't turn any lights on yet — we still have to set up the web service and the Photon app. Onward then!
Depending on which hosting environment you want to use, cd into either ./dialogflow-webhook/1-firebase-functions or ./dialogflow-webhook/2-app-engine, and continue the setup instructions in that directory's README.md file.
IMPORTANT: Regardless of what hosting/deployment method you choose, make sure you return to the Dialogflow panel and go into the Fulfillment tab to update the URL field. Also, check that the DOMAINS field is set to "Enable webhook for all domains". Without doing these things, Dialogflow won't be able to talk to your new webhook.
Make sure the Photon is correctly set up and connected. (If it’s not configured yet, follow the steps in the Particle docs
You can upload your code to your photon via the Particle web editor, the Particle Desktop IDE (based on Atom), or the Particle command-line tools.
We'll be using the CLI for this example, which you can install thusly:
sudo npm i particle-cli -g
To deploy via the command line, first make sure you’re logged in:
particle login
You can find out the ID of your device by running:
particle list
Then upload the code using that ID:
particle flash [YOUR-DEVICE-ID] particle-photon/particle-blink-demo.ino
The Photon should blink rapidly while the upload is in process, and when it's done (and calmly pulsing cyan), you're ready to go.
Note: Make sure you generate a Particle access token, and add that token (along with your Photon's device id) to your config.js file.
You can make sure it all works by running the following from your terminal:
curl https://api.particle.io/v1/devices/[YOUR-DEVICE-ID]/led -d access_token=[YOUR-ACCESS-TOKEN] -d led=on
If everything is configured properly, you should see something like the following:
{
    "id": "[YOUR-DEVICE-ID]",
    "last_app": "",
    "connected": true,
    "return_value": 1
}
You should see the Photon's light come on (along with an LED on the breadboard, if you've wired one up)! Doing the same with led=off will return a 0 instead of a 1, and will (you guessed it) turn the light off.
Note: If you ever see a "return_value":-1, that's an error message — something has gone wrong somewhere.
Once you’ve uploaded all the code and each service is configured, it’s time to give it all a try! You can confirm that everything went to plan by going to either your Assistant-enabled device or the Google Actions simulator, asking to talk to your app ("talk to [APP-NAME]"), and typing "turn the light on". If all goes well, your LED should turn on!
This application is just a taste of what's possible — how far you take this framework is up to you! Here are a few resources to help you continue on your journey:
By default, your Voice Kit doesn't do anything when it boots up; you must manually execute a program such as the Assistant Demo. But you can make this program (or any other program of your choice) run automatically upon bootup by creating a systemd service.
All you need is a .service configuration file. This file accepts a long list of configuration options, so we've provided an example for you that starts the Assistant Demo on bootup. You can find the file at ~/AIY-projects-python/src/examples/voice/assistant_grpc_demo.service and it looks like this:
[Unit]
Description=Assistant gRPC Demo
Wants=network-online.target
After=network-online.target
Wants=systemd-timesyncd.service
After=systemd-timesyncd.service

[Service]
Environment=DISPLAY=:0
Type=simple
Restart=always
User=pi
ExecStart=/usr/bin/python3 -u /home/pi/AIY-projects-python/src/examples/voice/assistant_grpc_demo.py --language en-US

[Install]
WantedBy=multi-user.target
To put this file into action, you need to put it into the /lib/systemd/system/ directory. But instead of actually moving this file there, you can create a symbolic link (a "symlink") in this directory that points to the file that already exists. You can do this as follows:
# Move to the directory with the .service file
cd ~/AIY-projects-python/src/examples/voice/

# Create the symlink
sudo ln -s `pwd`/assistant_grpc_demo.service /lib/systemd/system

# Reload the service files so the system knows about this new one
sudo systemctl daemon-reload
Now tell the system to run this service on bootup:
sudo systemctl enable assistant_grpc_demo.service
All set! You can try rebooting now to see it work.
Or manually run it with this command:
sudo service assistant_grpc_demo start
Note: Even after the prompt returns from this command, it takes a few moments for the program to start. When the Assistant Demo is ready, the button lights up.
If you want to stop the service from running on bootup, disable it with this command:
sudo systemctl disable assistant_grpc_demo.service
And to manually stop it once it's running, use this command:
sudo service assistant_grpc_demo stop
You can check the status of your service with this command:
sudo service assistant_grpc_demo status
Now to create a similar service for your own program, just copy the configuration from above to a new file such as my_program.service (the name must end with .service). Then (for most programs) all you need to do is change ExecStart so it points to your program's Python file (and passes it any necessary parameters), and change Description to describe your program. Then follow the steps above using your service name instead.
If you'd like to better understand the service configuration file, see the .service config manual.
If you need to see more logs to help with debugging (or you're simply curious to see more output), you can view system logs and program-specific logs using the journalctl tool.
By default, this prints a lot of system information that won't be useful to you, so it's best if you launch your program as a service and then tell journalctl to print only the logs from that service.
For example, if you start the Assistant Demo as a service, you can begin printing all log output for that service with this command:
sudo journalctl -u assistant_grpc_demo -f
The -f option continuously prints new log entries as they occur. To stop printing the log, press Control+C.
To get the latest bug fixes and features, update the system image for your kit as follows:
.img.xz file from our releases page on GitHub..img.xz file you
downloaded above.When flashing is done, put the microSD card back in your kit and you're good to go!
If you're having trouble assembling your kit or running the demos, try the following resources:
You did it! Whether this was your first hackable project or you’re a seasoned maker, we hope this project has sparked new ideas for you. Keep tinkering, there’s more to come.